


Push notifications are a powerful tool for mobile app engagement, allowing you to keep your users informed with timely and relevant information, even when the app is not active. In this tutorial, we’ll guide you through the process of setting up push notifications in a React Native app for Android using Firebase Cloud Messaging (FCM). We’ll use the example of an app named “PushDroid.”
Prerequisites
Before we begin, make sure you have the following:
- Node.js installed on your development machine.
- React Native CLI set up (not Expo).
- An Android device or emulator for testing.
- A Firebase project set up in the Firebase console.
To set up and install React Native, you can follow the tutorial mentioned below:
The entire codebase can be accessed on the following GitHub repository: https://github.com/mesepith/PushDroid
Step 1: Create a React Native Project
If you don’t have a React Native project yet, create one using the following command:
npx react-native init PushDroidTo run your application, execute the following command:
npx react-native run-androidStep 2: Install Firebase Libraries
Navigate to your project directory and install the necessary Firebase packages:
npm install @react-native-firebase/app @react-native-firebase/messagingStep 3: Set up a new Firebase project.
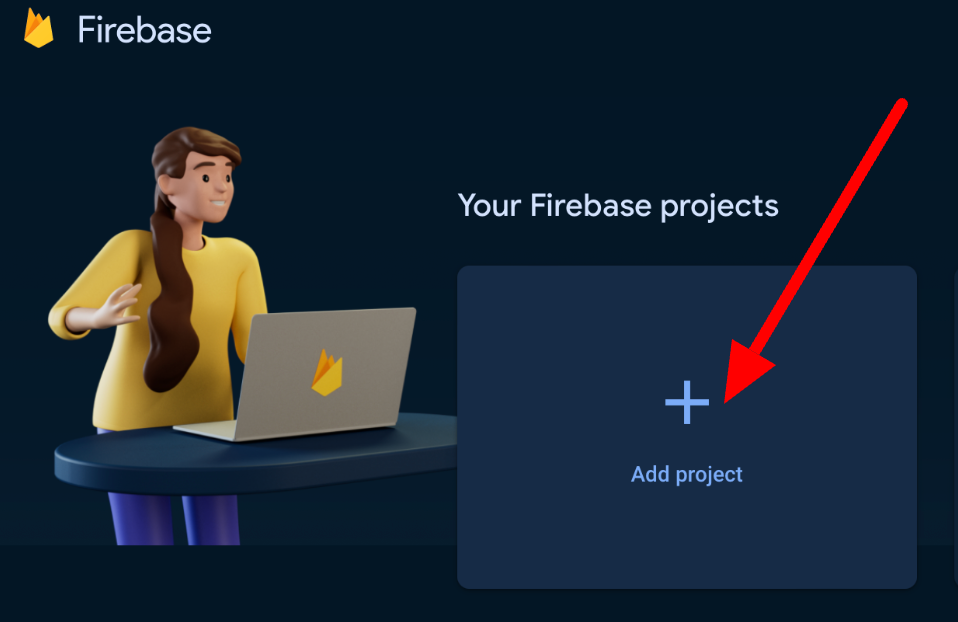
1. Go to firebase console by clicking this link console.firebase.google.com
In your Firebase project console, add an Android app.

2. Enter your app name (e.g. PushDroid) and click on the “Continue” button as indicated in the image below:


Please make sure to follow all the steps that will be outlined in order to successfully create a firebase project.
Step 4: Add Firebase to Your Android App
1. Find package name of your app.
Inside your android react native project go to android/app/src/main/java/com/pushdroid/MainActivity.kt
Your package name will be mentioned at the top as shown on below screenshot.
In our case our package name is com.pushdroid


2. Navigate to your Firebase project, in this instance, PushDroid, and select the Android icon as demonstrated in the screenshot provided below:


3. Register the app with the package name you have set in your React Native project (e.g., com.pushdroid).


4. Download the google-services.json file and place it in the android/app directory of your React Native project

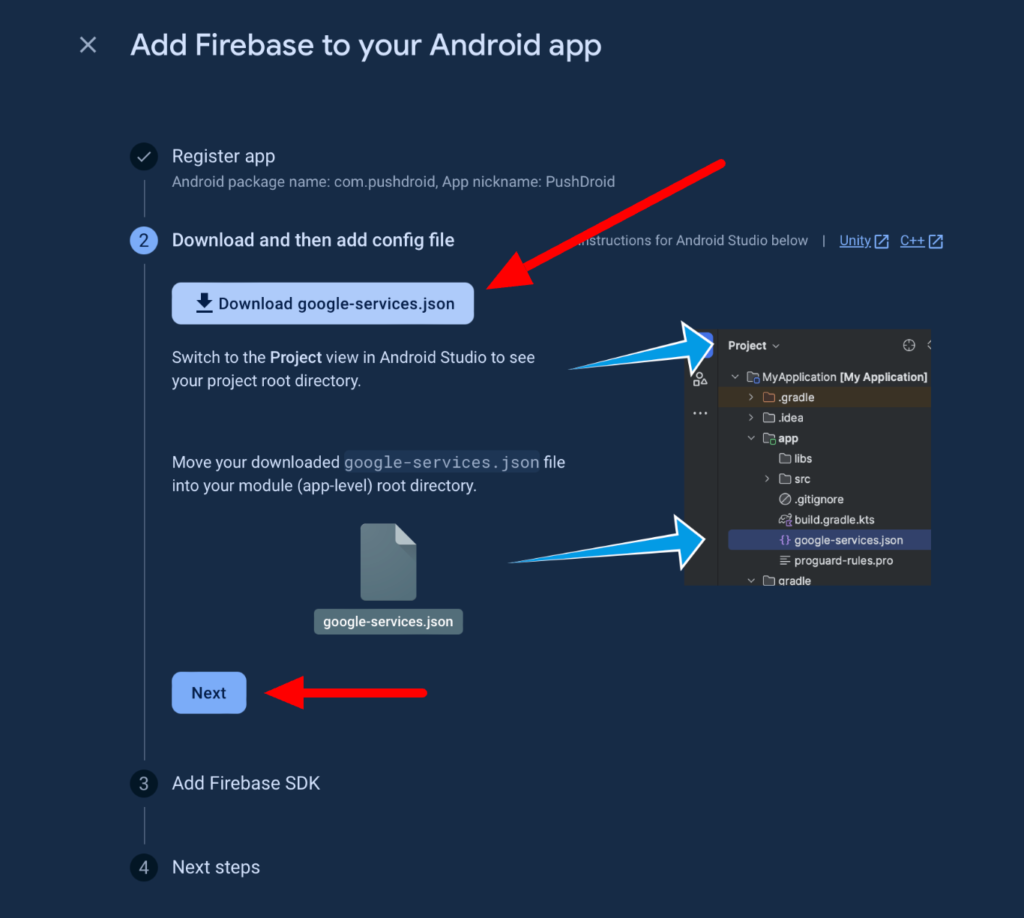
Proceed by clicking the “Next” button and carefully follow each step provided.
Step 5: Update Android Configuration
1. In your Android build script (android/build.gradle), add the classpath for Google services in dependencies:
classpath 'com.google.gms:google-services:4.4.1' // Google Services plugin

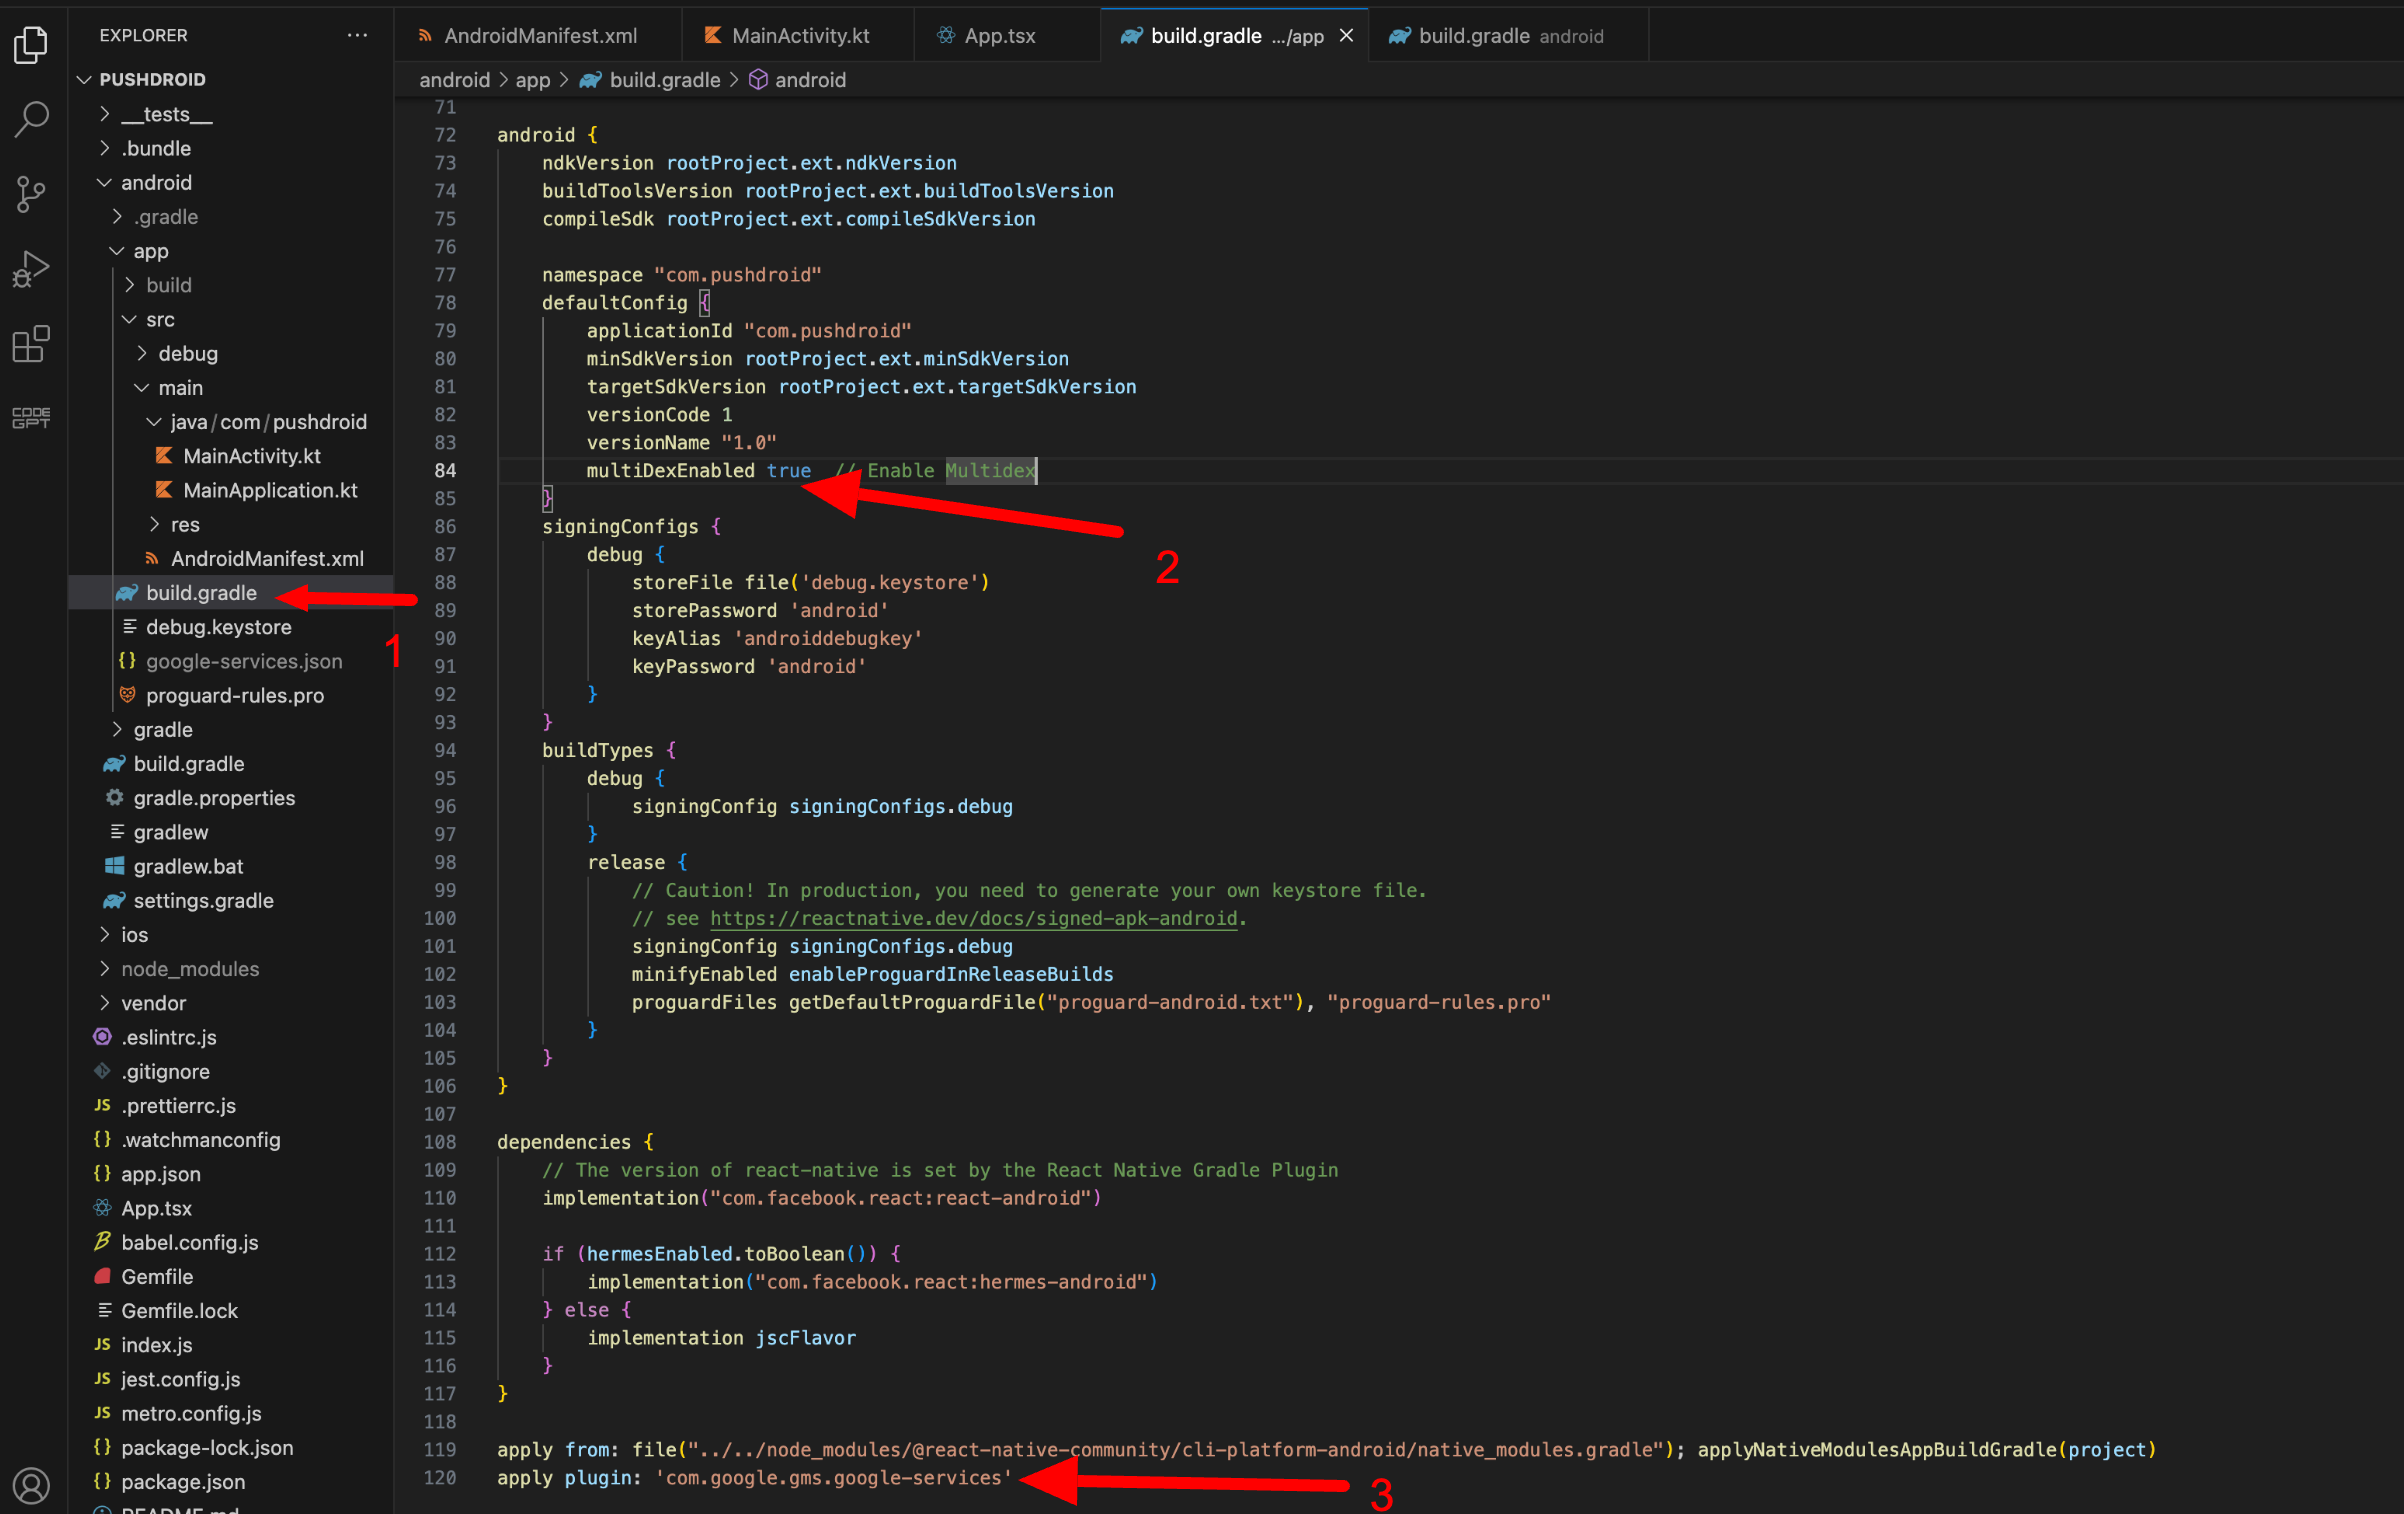
2. In your app-level android/app/build.gradle, add the following at the bottom of the file:
apply plugin: 'com.google.gms.google-services'3. Also write multiDexEnabled true in defaultConfig of android/app/build.gradle as shown on below screenshot.

4. Add necessary permissions in android/app/src/main/AndroidManifest.xml
<uses-permission android:name="android.permission.INTERNET" />
<uses-permission android:name="android.permission.RECEIVE_BOOT_COMPLETED" />
<uses-permission android:name="android.permission.VIBRATE" />

Step 6: Request Notification Permissions
Modify your App.tsx to request user permissions for notifications:
import React, { useEffect } from 'react';
import { Alert, Button, SafeAreaView, StatusBar, StyleSheet, Text } from 'react-native';
import messaging from '@react-native-firebase/messaging';

const App = () => {
  useEffect(() => {
    requestUserPermission();
  }, []);

  const requestUserPermission = async () => {
    const authorizationStatus = await messaging().requestPermission();
    if (authorizationStatus === messaging.AuthorizationStatus.AUTHORIZED || authorizationStatus === messaging.AuthorizationStatus.PROVISIONAL) {
      console.log('Authorization status:', authorizationStatus);
    }
  };

  return (
    <SafeAreaView style={styles.container}>
      <StatusBar barStyle="dark-content" />
      <Text>Welcome to PushDroid!</Text>
      <Button title="Get FCM Token" onPress={getFcmToken} />
    </SafeAreaView>
  );
};

const getFcmToken = async () => {
  const token = await messaging().getToken();
  if (token) {
    console.log('Your Firebase Token is:', token);
  } else {
    console.log('Failed to get the token');
  }
};

const styles = StyleSheet.create({
  container: {
    flex: 1,
    justifyContent: 'center',
    alignItems: 'center',
    backgroundColor: '#F5FCFF',
  }
});

export default App;Step 7: Handle Incoming Notifications
To handle notifications, whether the app is in the foreground, background, or terminated, you can set up listeners like so:
useEffect(() => {
  // Foreground
  const unsubscribeOnMessage = messaging().onMessage(async remoteMessage => {
    Alert.alert('A new notification arrived!', JSON.stringify(remoteMessage.notification));
  });

  // Background and quit states
  messaging().setBackgroundMessageHandler(async remoteMessage => {
    console.log('Received in background:', remoteMessage);
  });

  return () => {
    unsubscribeOnMessage();
  };
}, []);Step 8: Testing Your Setup
1. Run your React Native application on an Android device or emulator.
npx react-native run-android2. The getFcmToken function will generate a token, which will then be outputted in the console log. Make sure to copy the token.
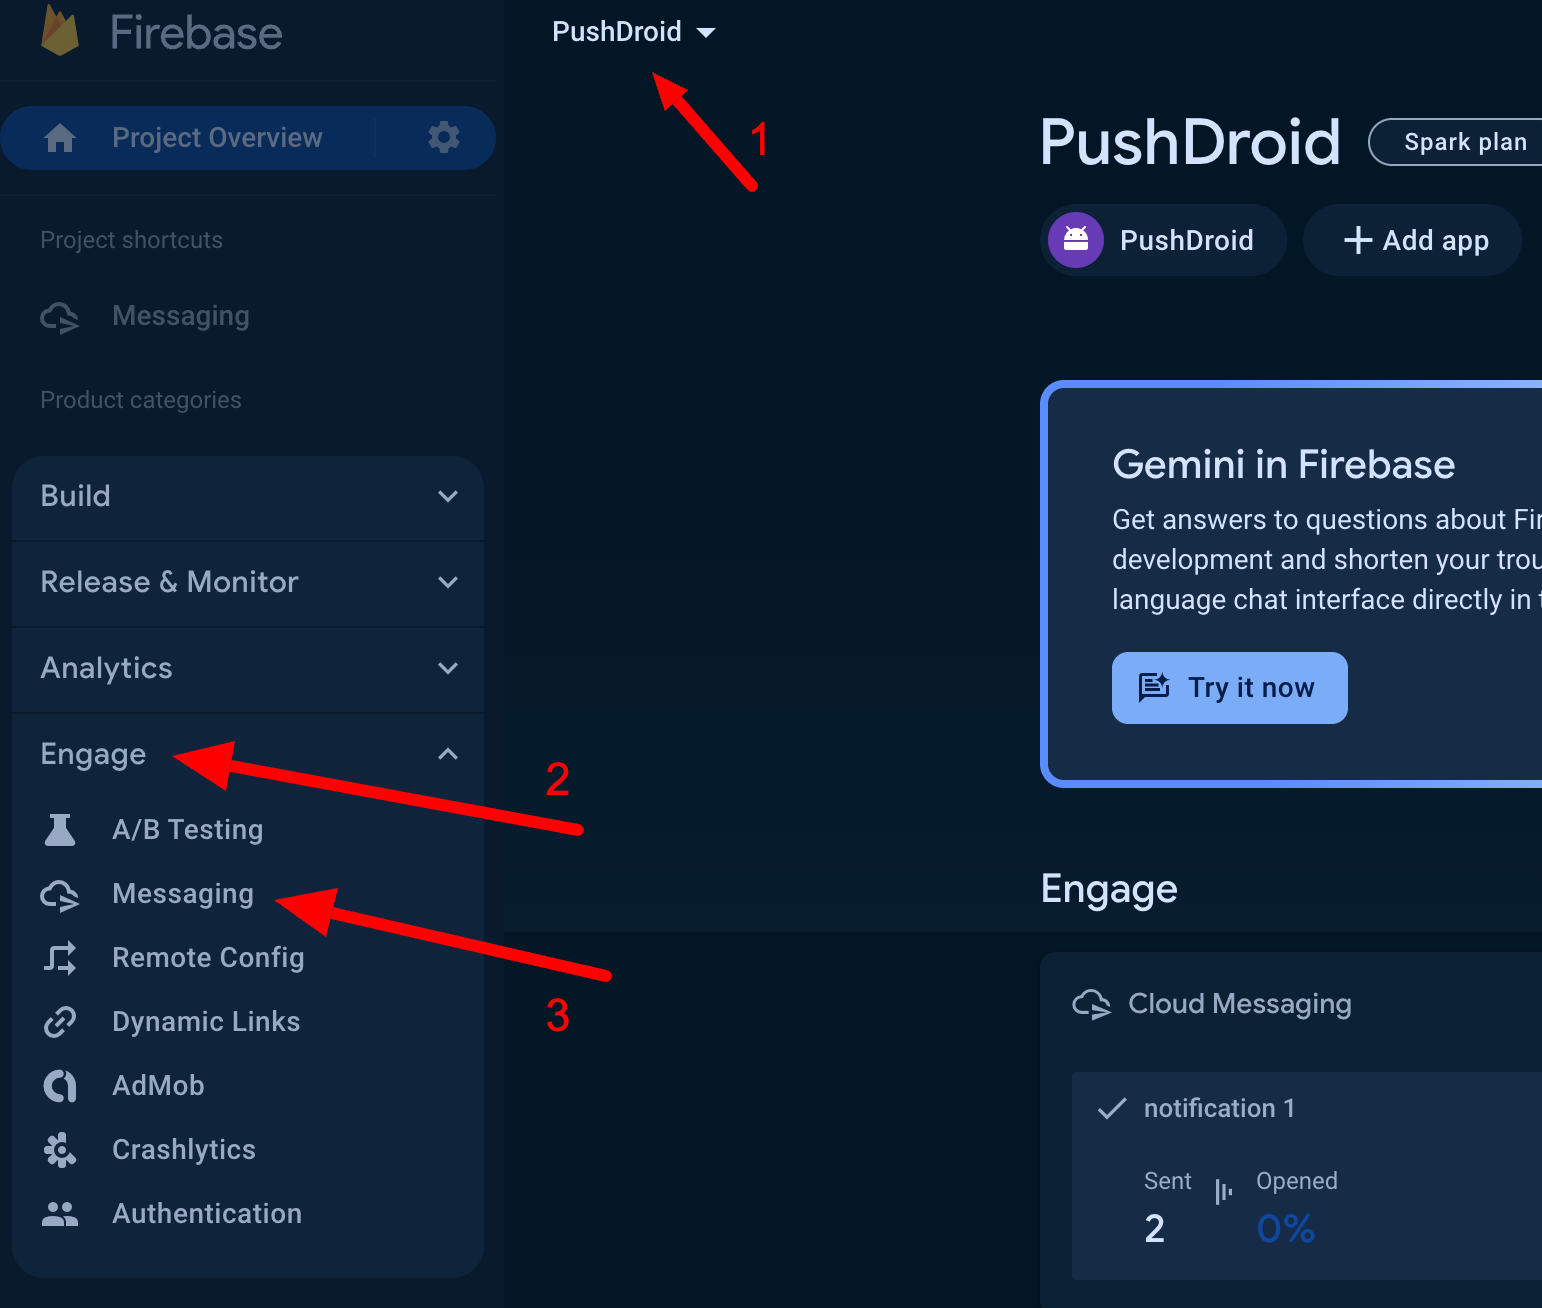
3. Navigate to your Firebase Project and select “Engage” from the menu. Within the “Engage” section, click on “Messaging” as depicted in the image below.

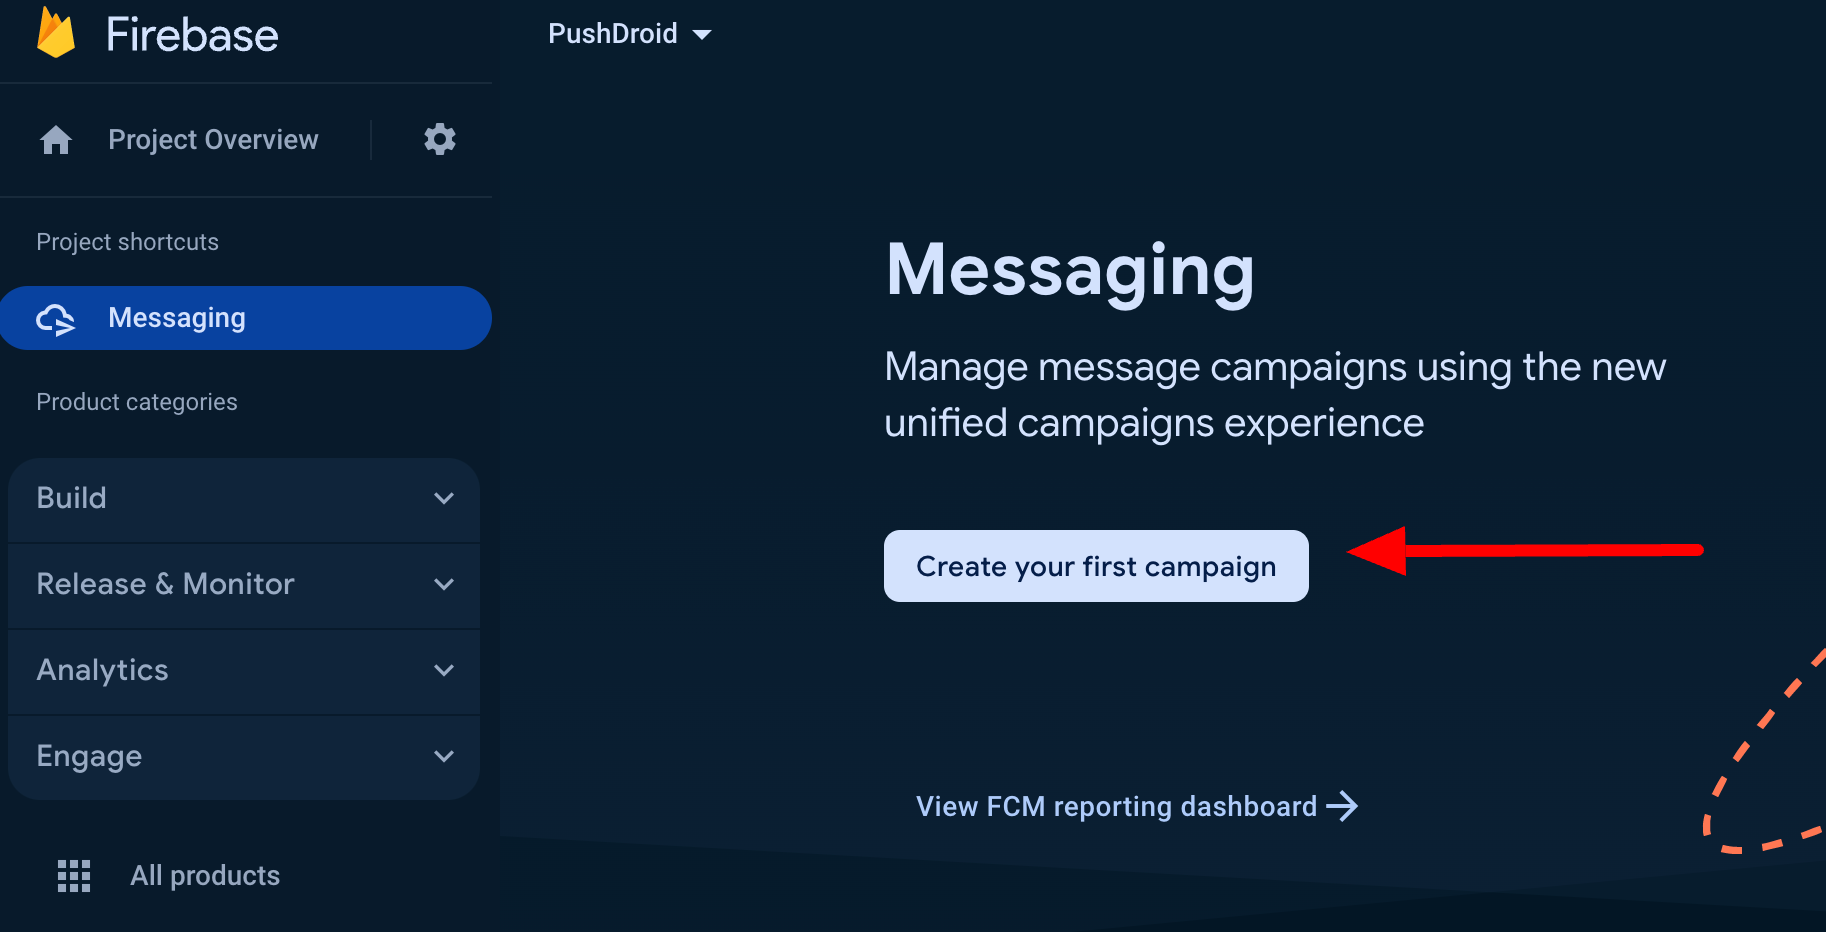
4. Click on ‘Create your first campaign‘

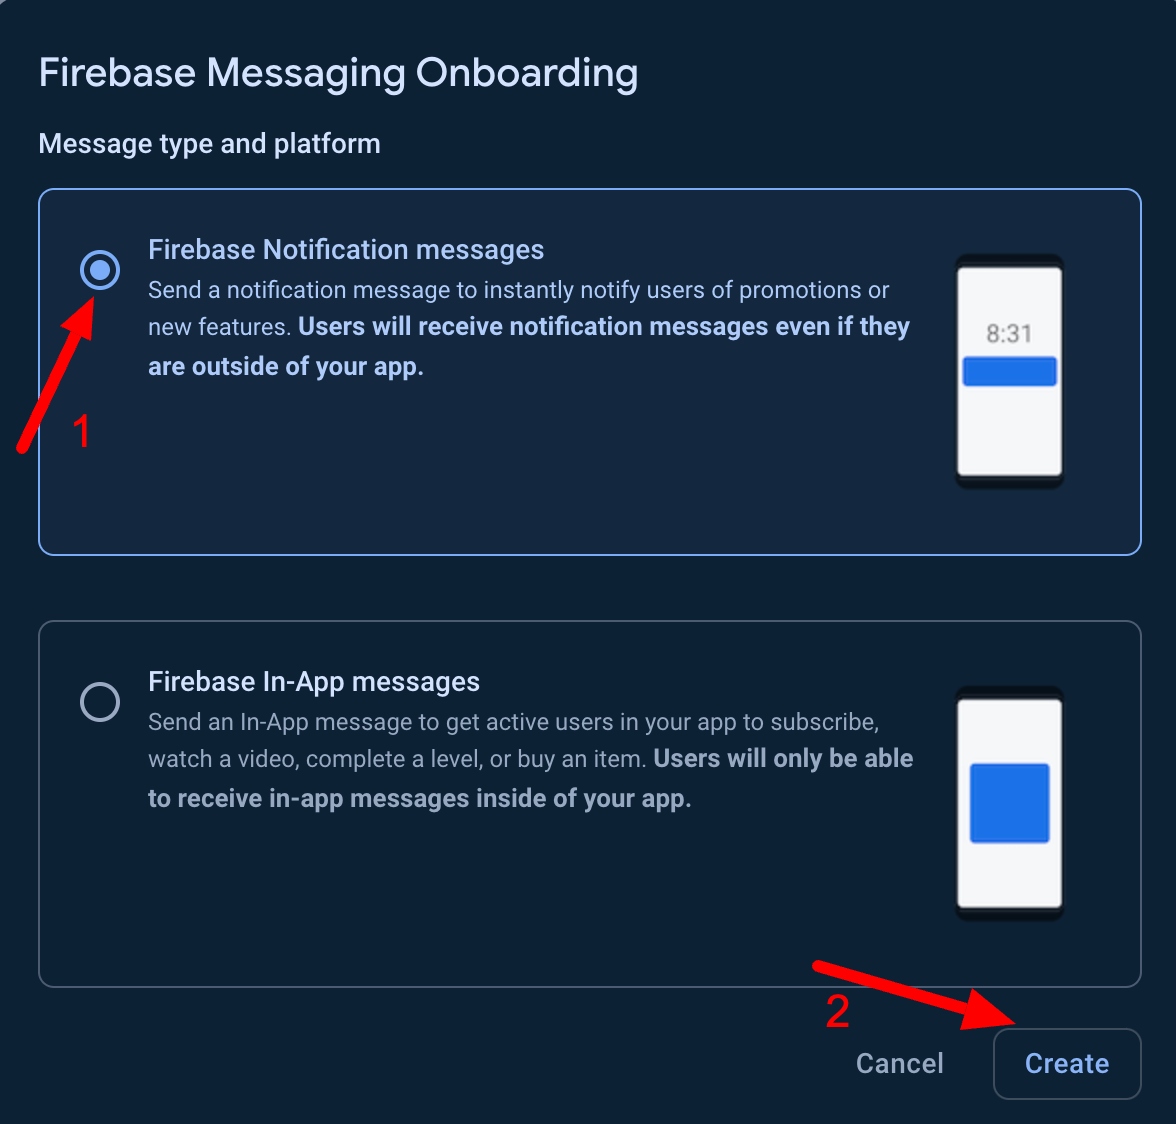
5. Choose Firebase Notification messages and click Create .

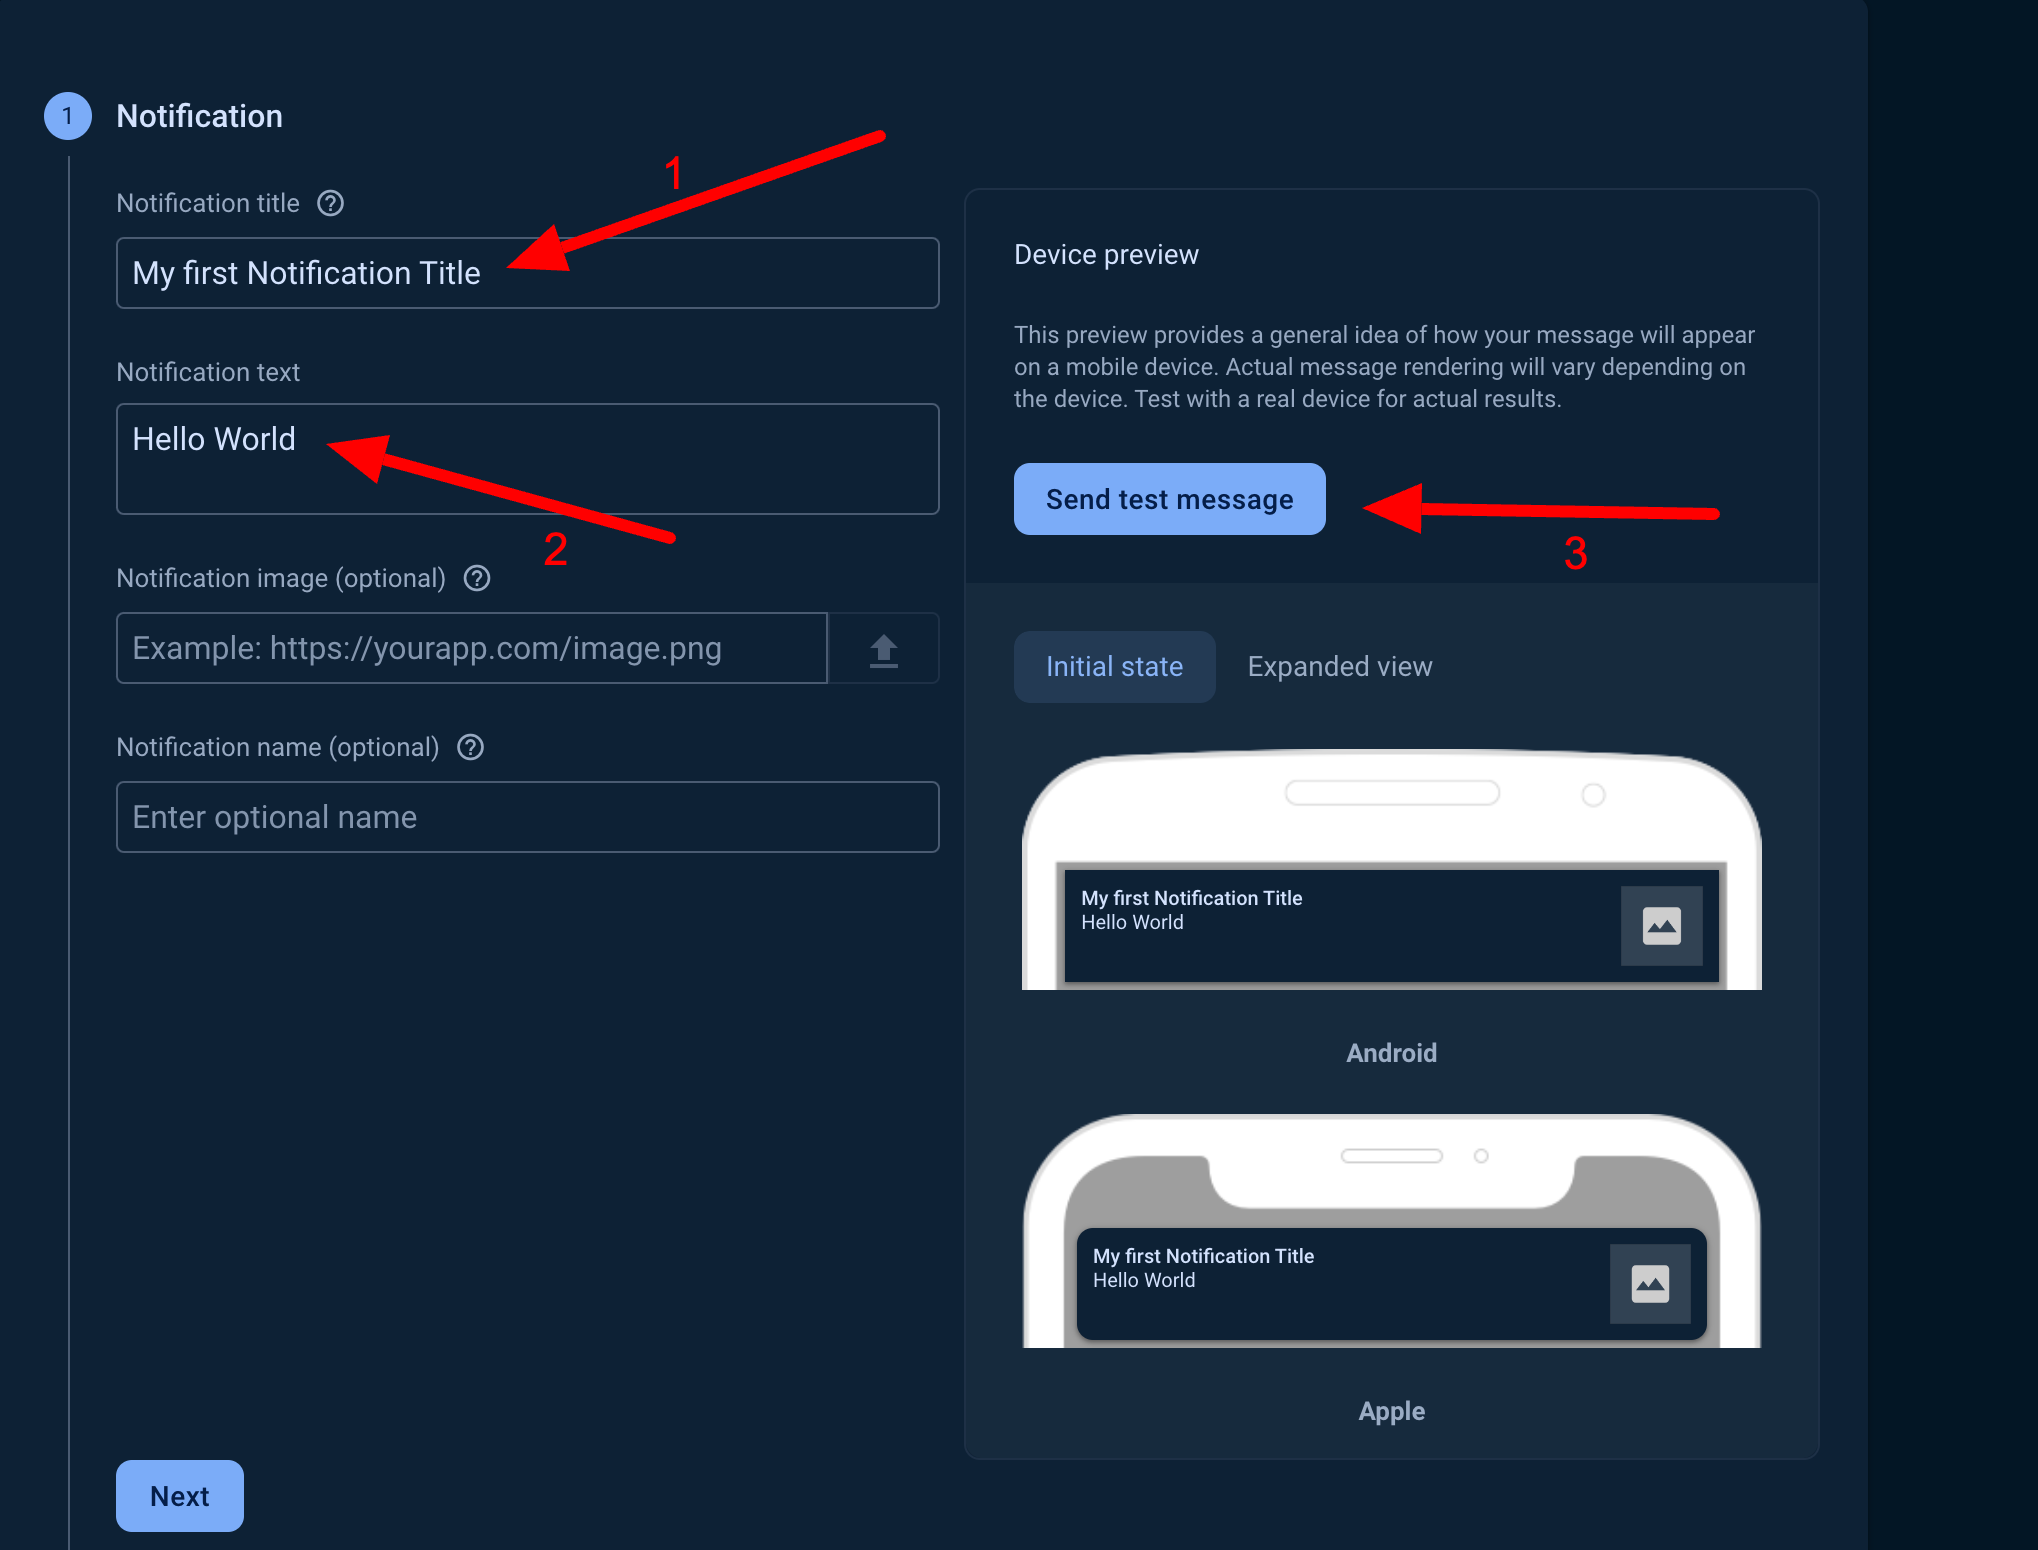
6. Write your Notification Title and Notification Text and click on Send test message as shown on below image .

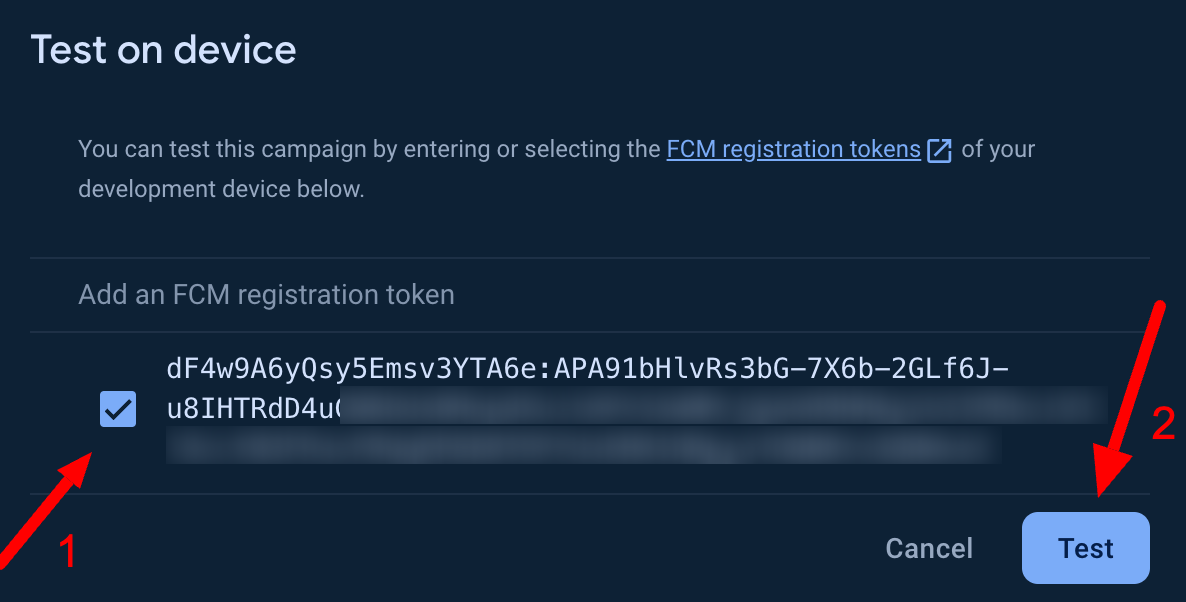
7. Insert the token generated by the getFcmToken function, which is displayed in your console.

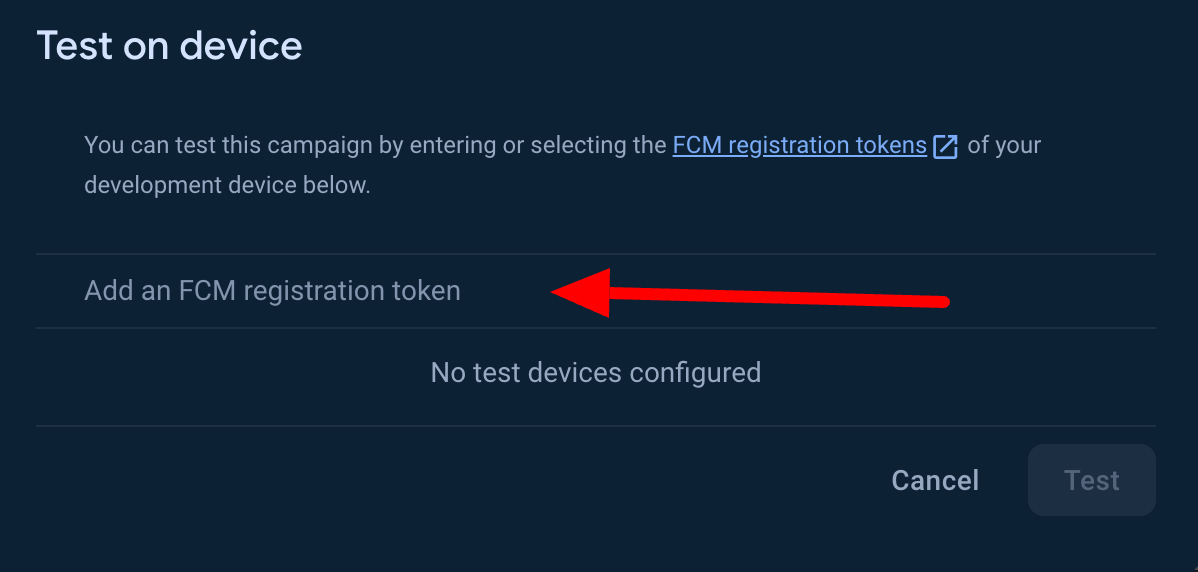
8. Once you have added your token, click on the “+” icon as illustrated in the screenshot below.


9. Click on Test

You’ll get a notification on your phone. If you don’t get it, wait a bit and try again, or make sure the app has permission to send notifications.
Conclusion:
You have successfully implemented push notifications in your React Native app for Android using Firebase. This setup not only enables you to engage users effectively but also leverages the robust capabilities of Firebase for more advanced features like analytics and user segmentation.