

While it’s not possible to directly install and run Android apps designed for smartphones on your Mac, Android Studio offers a powerful workaround. This versatile development environment lets you create and test your own Android applications and emulate them on a range of Android devices right on your Mac.
If you’re ready to start developing Android apps, the first step is to get your hands on Android Studio, the official integrated development environment (IDE). Here’s a guide to downloading and installing it on your Mac:
Prerequisites
Before you begin, ensure your Mac meets the following requirements:
- Operating System: macOS 10.14 (Mojave) or later
- RAM: At least 8 GB (16 GB recommended)
- Disk Space: Minimum of 4 GB, but 2 GB additional is recommended for the Android SDK and emulator
Download and Installation
Download Android Studio:
- Visit the official Android Studio website: https://developer.android.com/studio

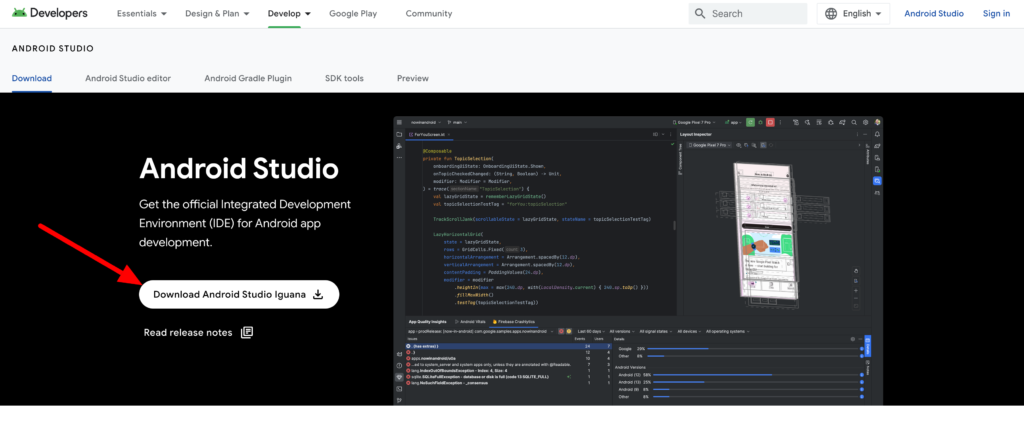
Click on ‘Download Android Studio Iguana‘.
2. It will open ‘Terms and Conditions’ modal . Go to bottom .
Check the checkbox ‘ I have read and agree with the above terms and conditions’ and click on Download button that says ‘Mac With Apple Chip’.

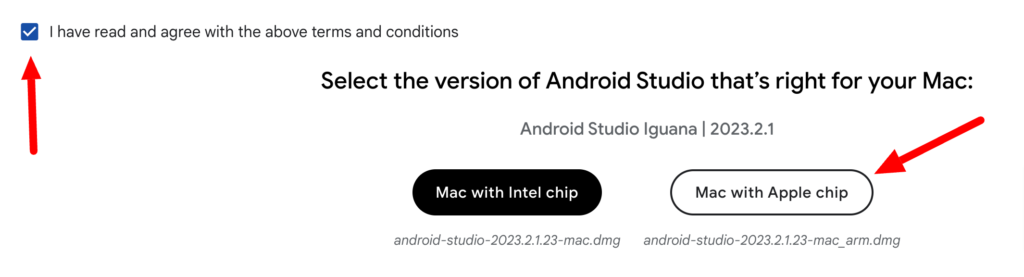
It will download dmg installation of Android Studio.
Install:
- Open the downloaded DMG file.


Drag and drop the Android Studio icon into your “Applications” folder.
Run the Setup Wizard:
- Launch Android Studio from your “Applications” folder.
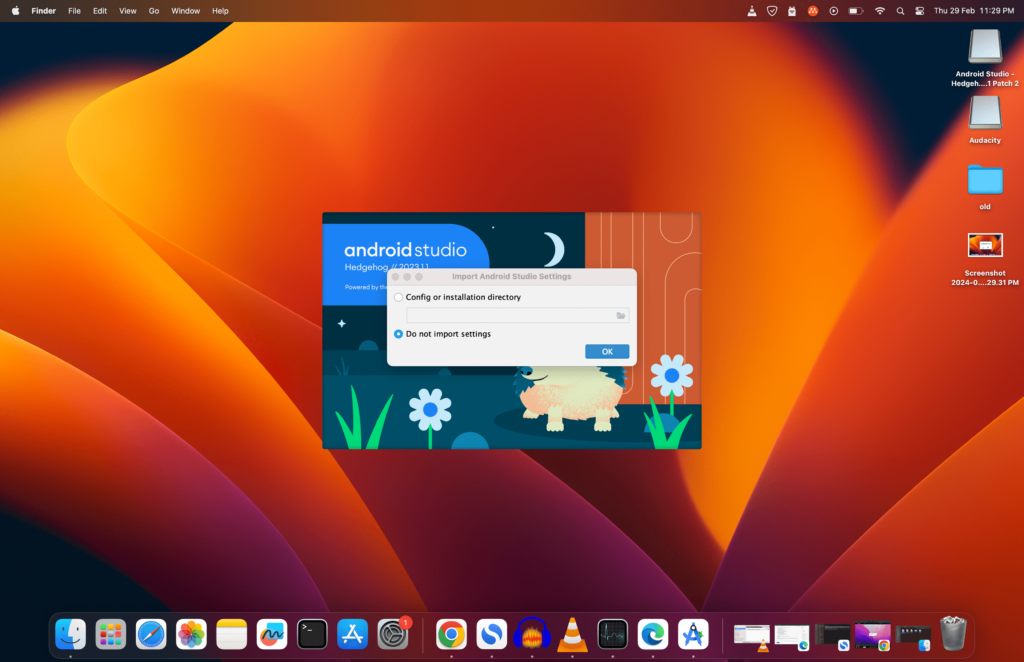
Choose ‘Do not import setting’ and click OK.
2.
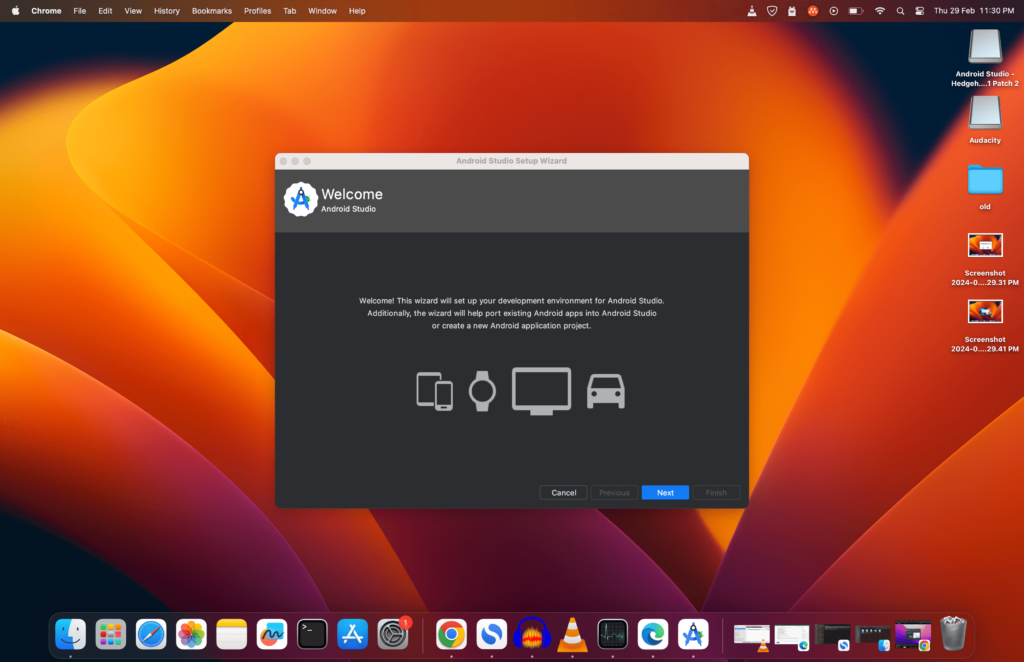
Click Next.
3.

Choose Standard and Click Next.
4.
Click Next.
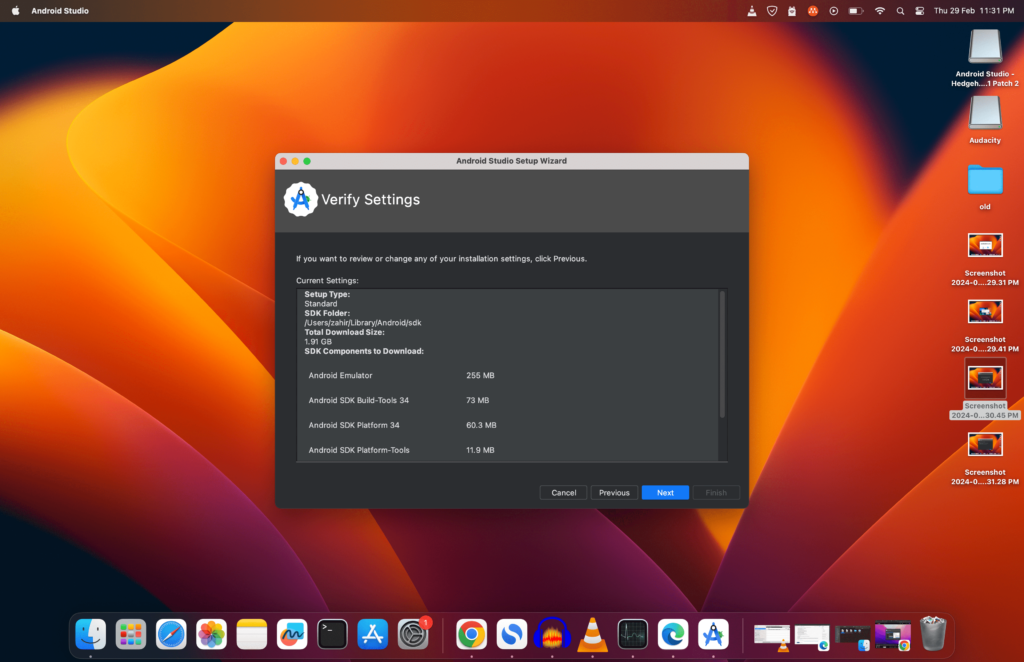
5.

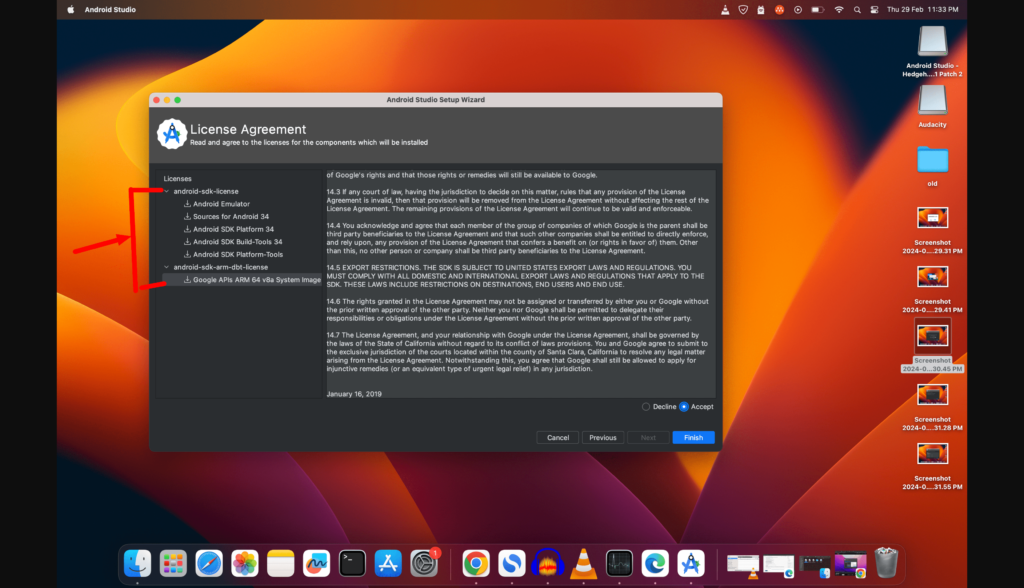
Accept permission of each SDB mention in left side and click on Finish
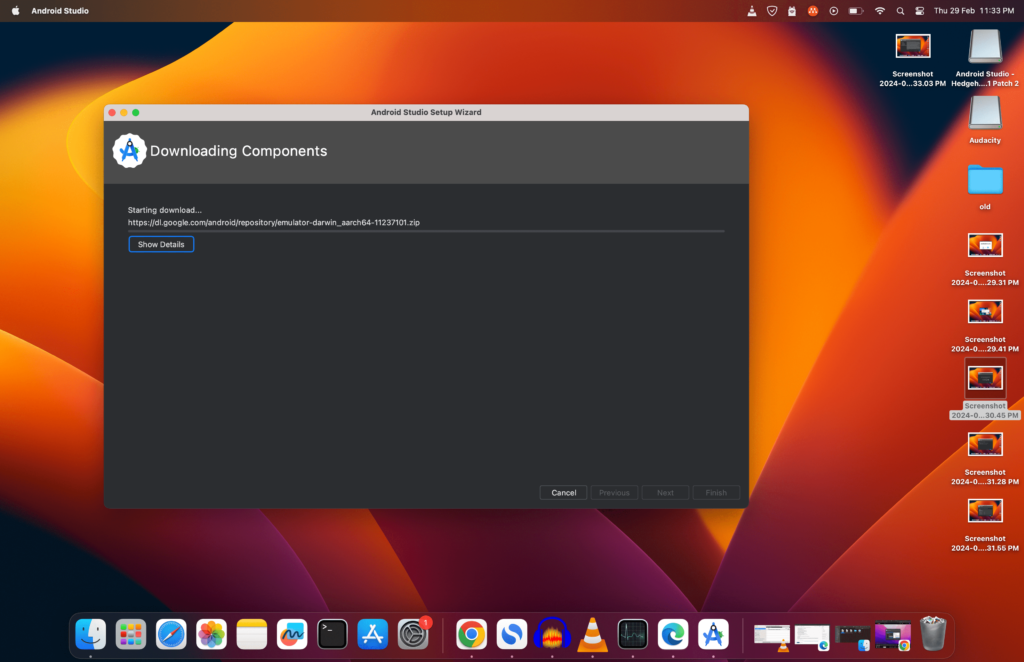
Now it will start to ‘Downloading Components’.
6.
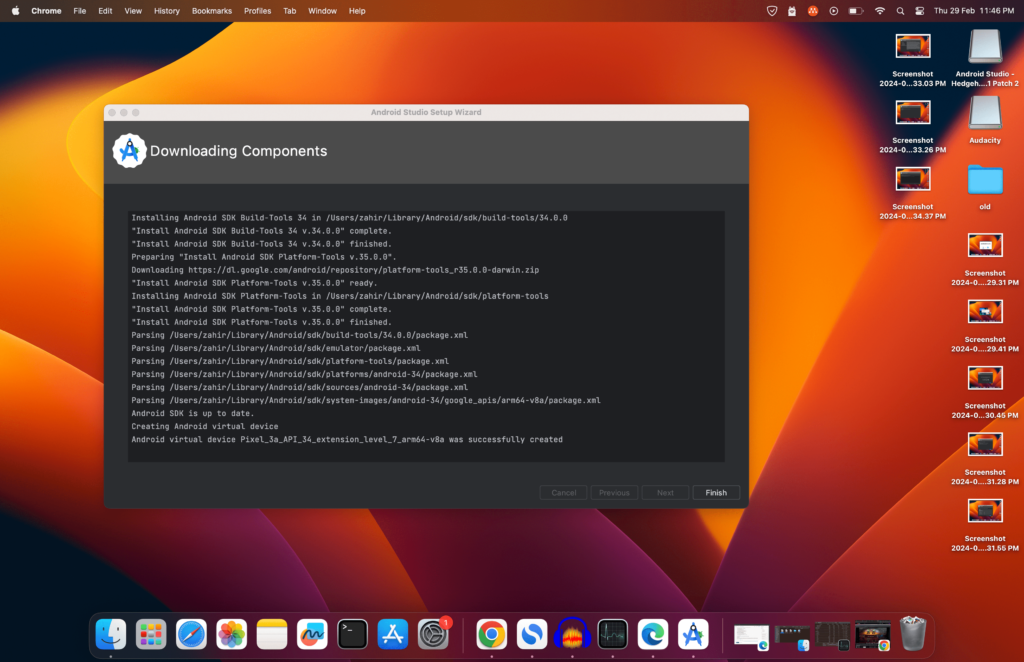
After finishing of Downloading click on Finish .
7.
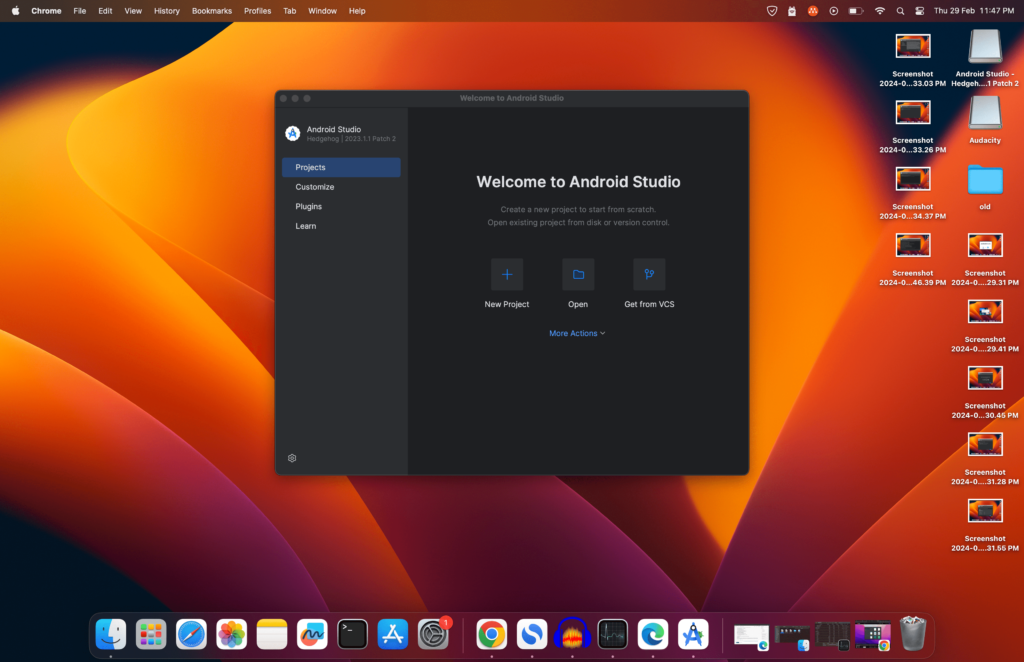
Now it will appear with Android Studio Welcome window. Click on New Project.
8.
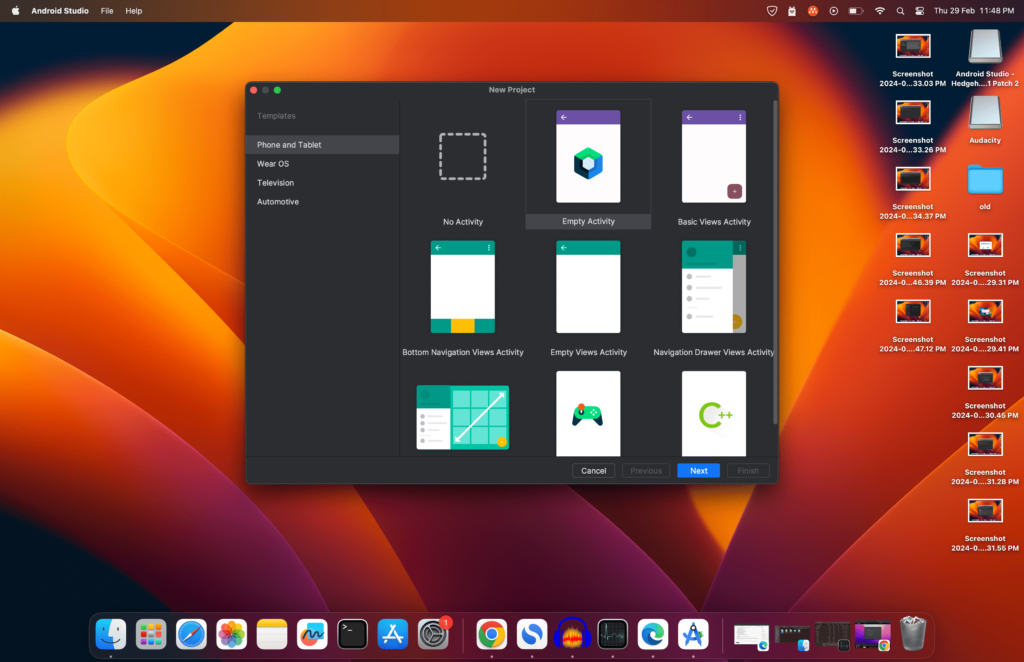
Now choose ‘No Activity’.
9.
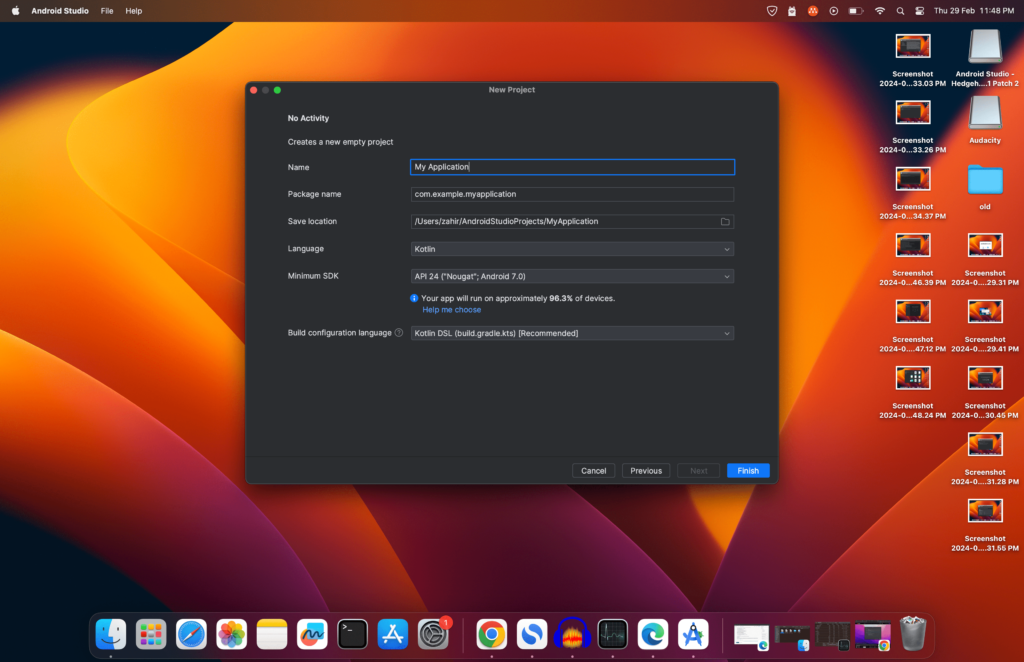
Now it will ask you to create a project. Remain this as it is and click on Finish.

It will open Android Studio window.
10.

It will start to download packages. You can check these downloading packages on clicking left side button mention in the above image.
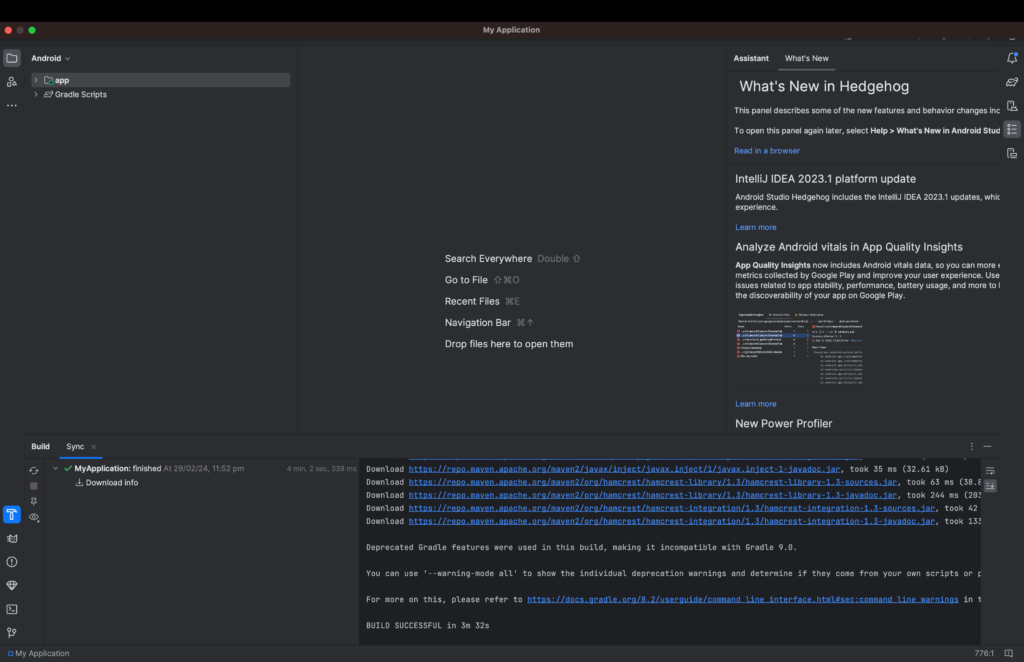
After finishing of downloading wait for the ‘BUILD SUCCESSFUL‘ message.
11.
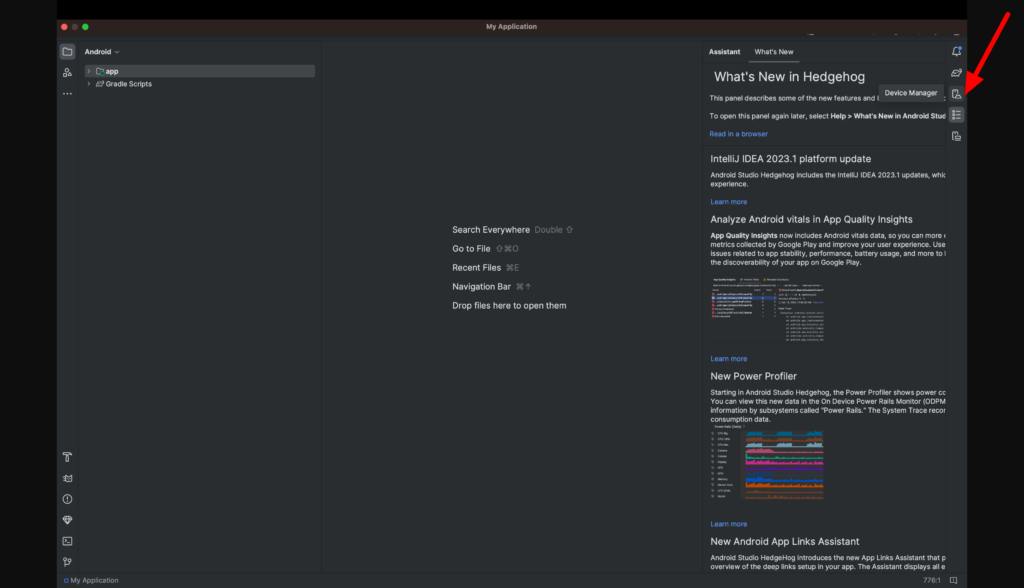
Now click on ‘Device Manager’. Check red arrow mention in upper right side of above screenshot.
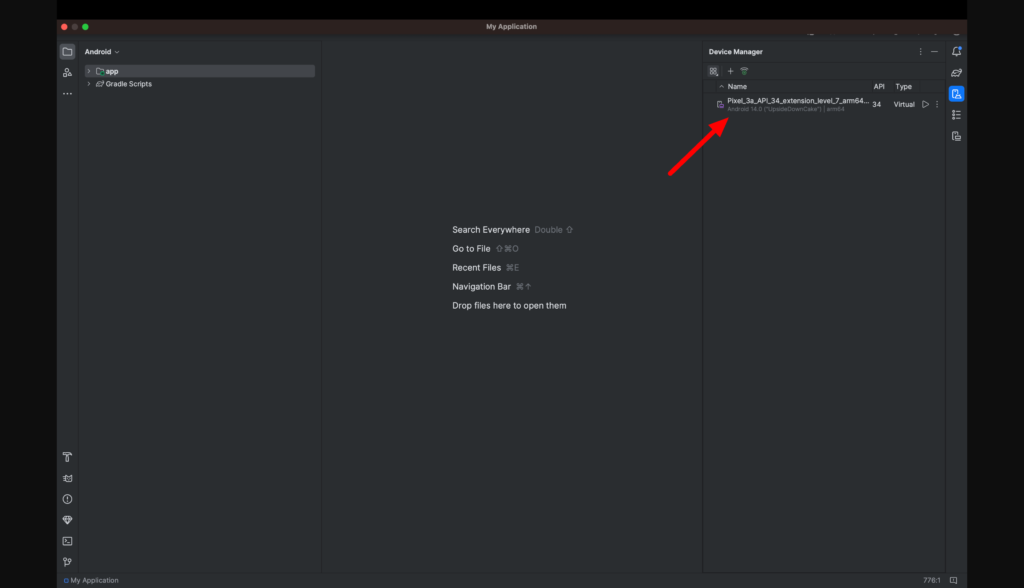
It will show list of android emulator present on the Device Manager. Now you need to check whether the present emulator has Google Play store.
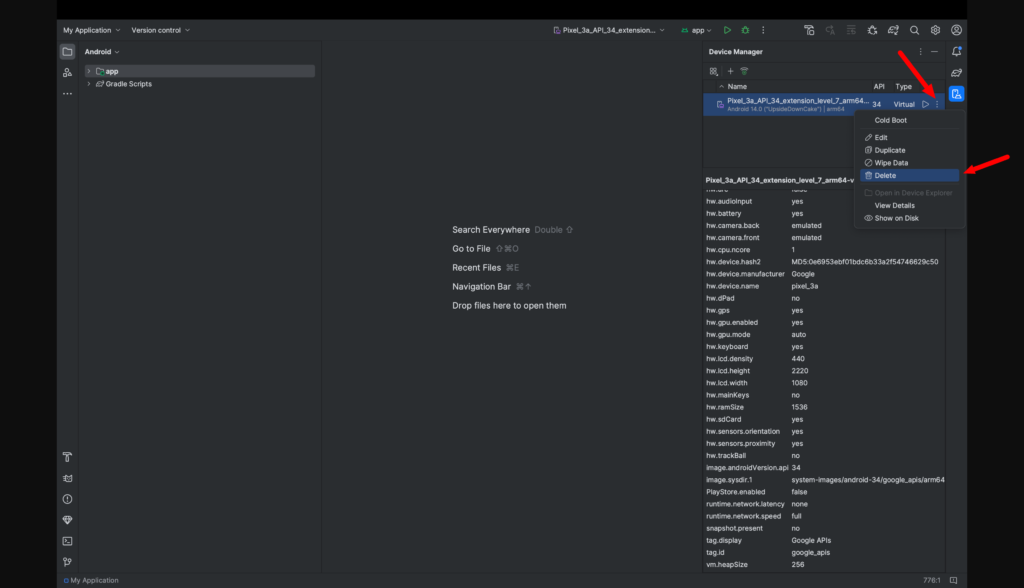
12.
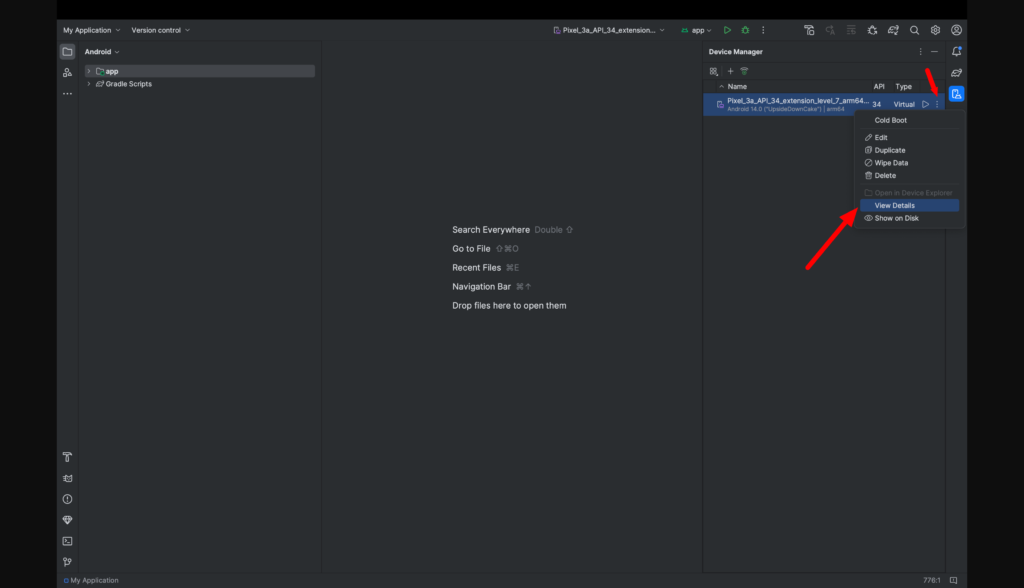
Click on three dots mentioned in the above image and click on View Details.
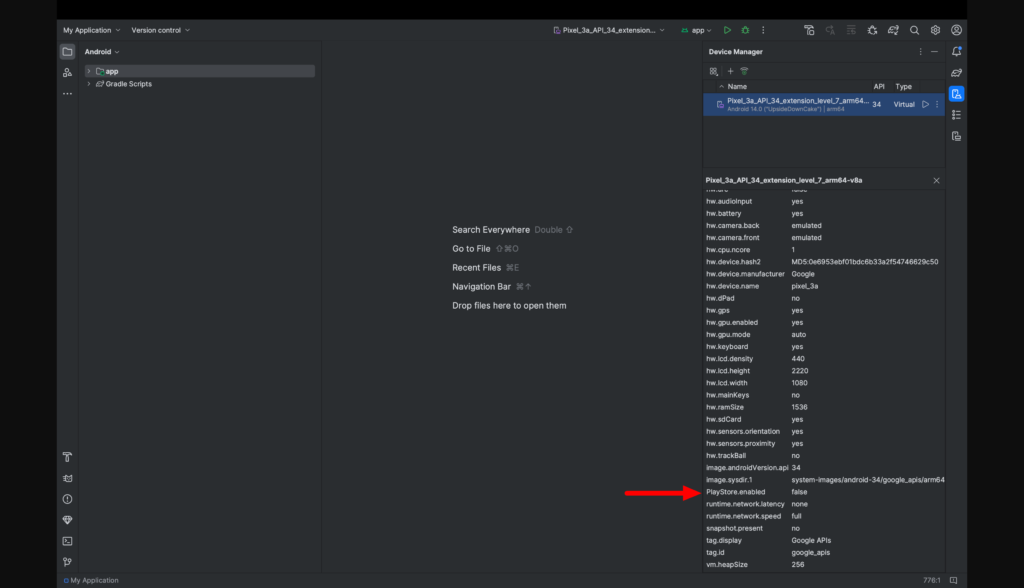
As you can see in the above image ‘PlayStore enabled’ has false value.
13.
So delete the current emulator. Click on three dots and click on Delete.
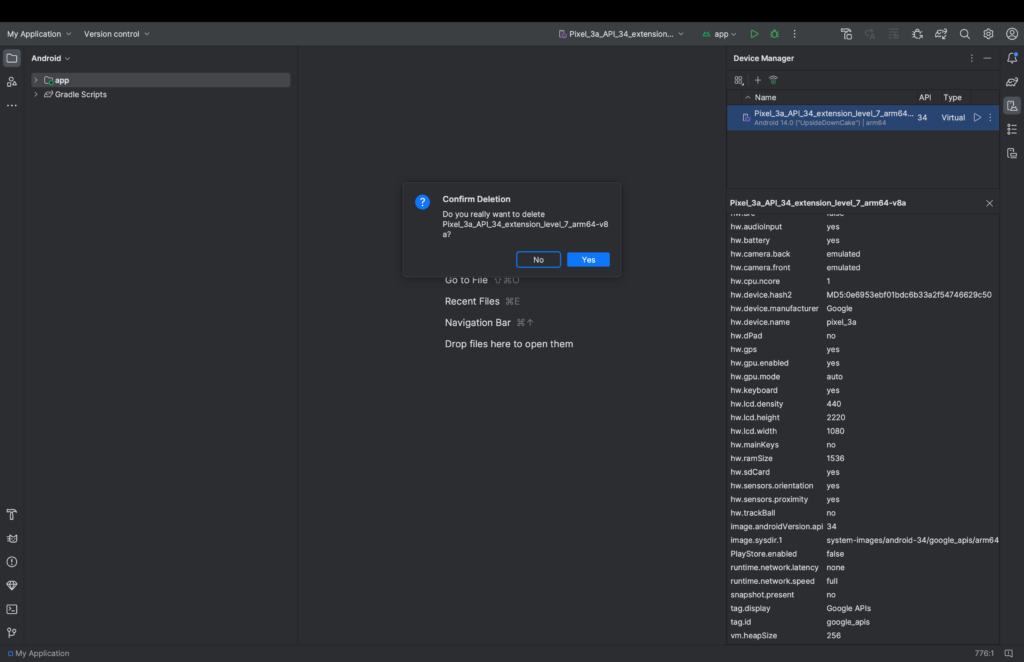
Click on Yes.
14.
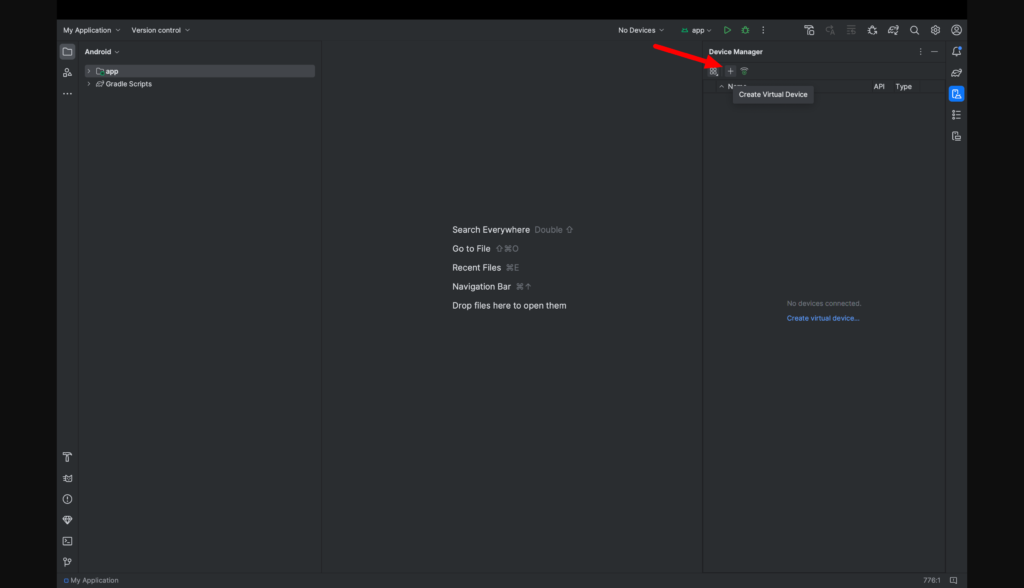
Click on ‘+‘ mentioned in the Device Manager to create a new Visual Device(emulator).
15.
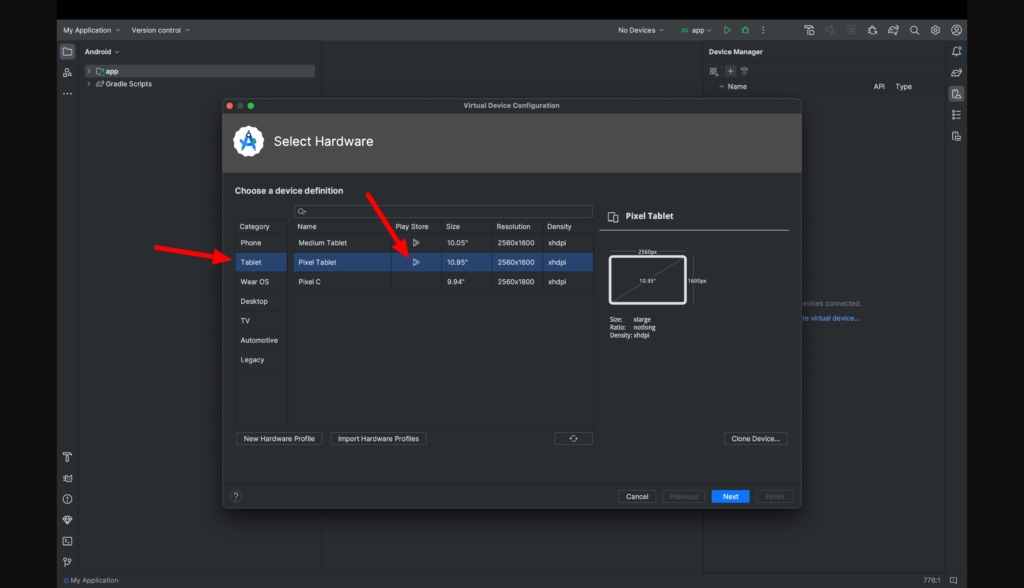
It will popup with a window with list of emulator. I have chosen Tablet as mentioned in the above image. You can choose mobile phone or other devices.
While choosing devices look for Play Store Icon mentioned in the above image. I have chosen Pixel Tablet.
Now click on Next.
16.
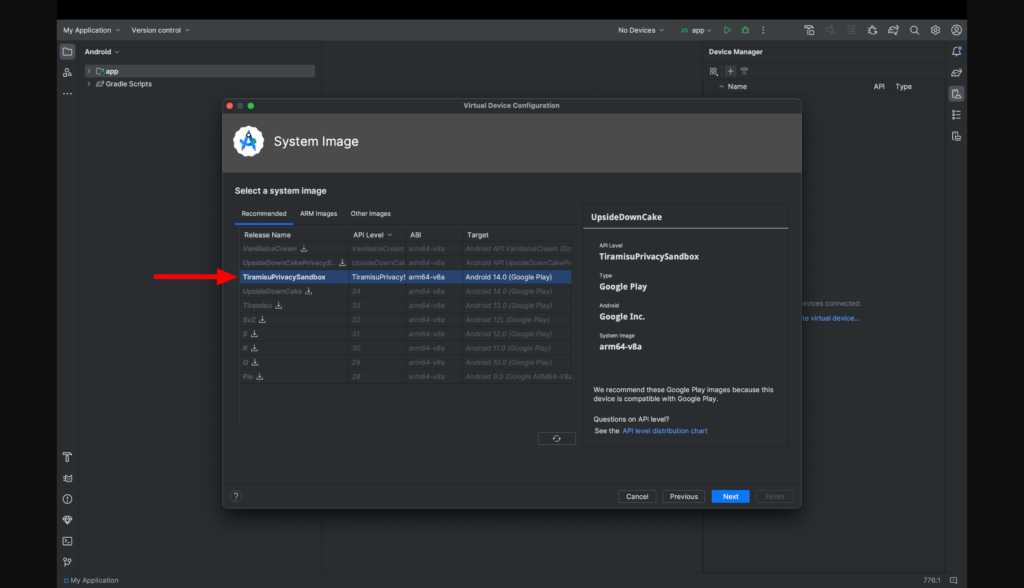
Choose System Image. I have chosen TiramisuPrivaySandbox. You can choose any one but it is better not to choose latest one as it might have some compatibility issue.
17.
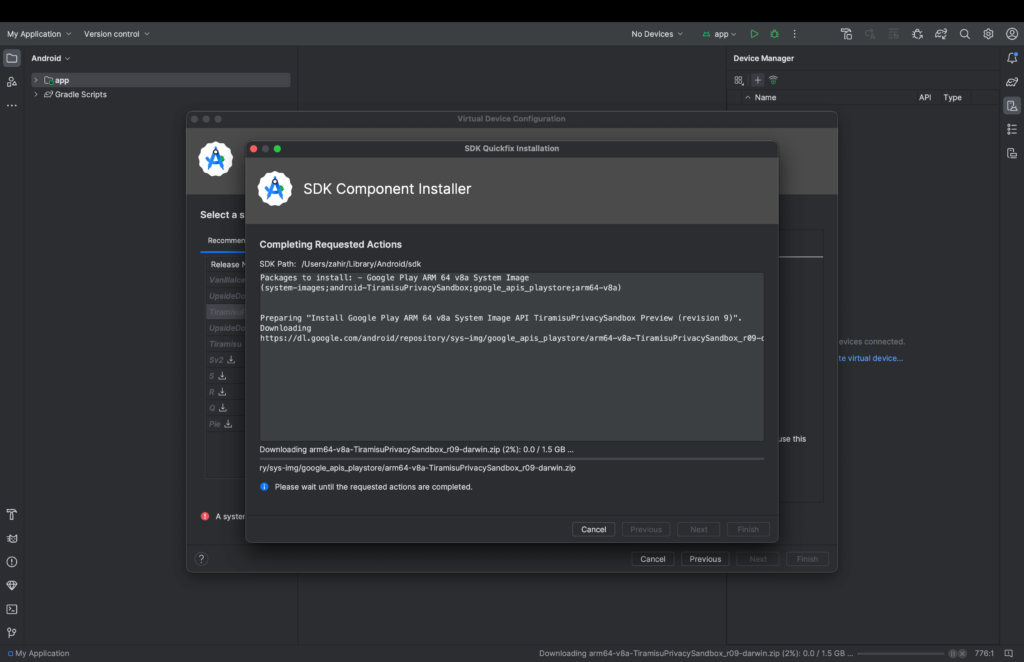
Let it download the image.
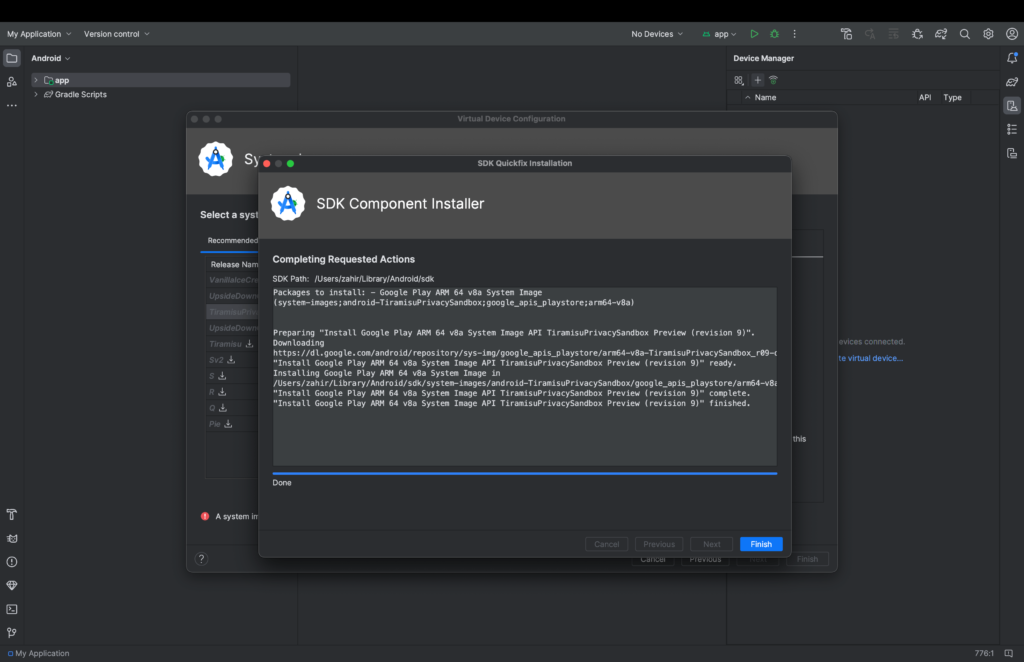
After downloading done of image click on Finish.
18.
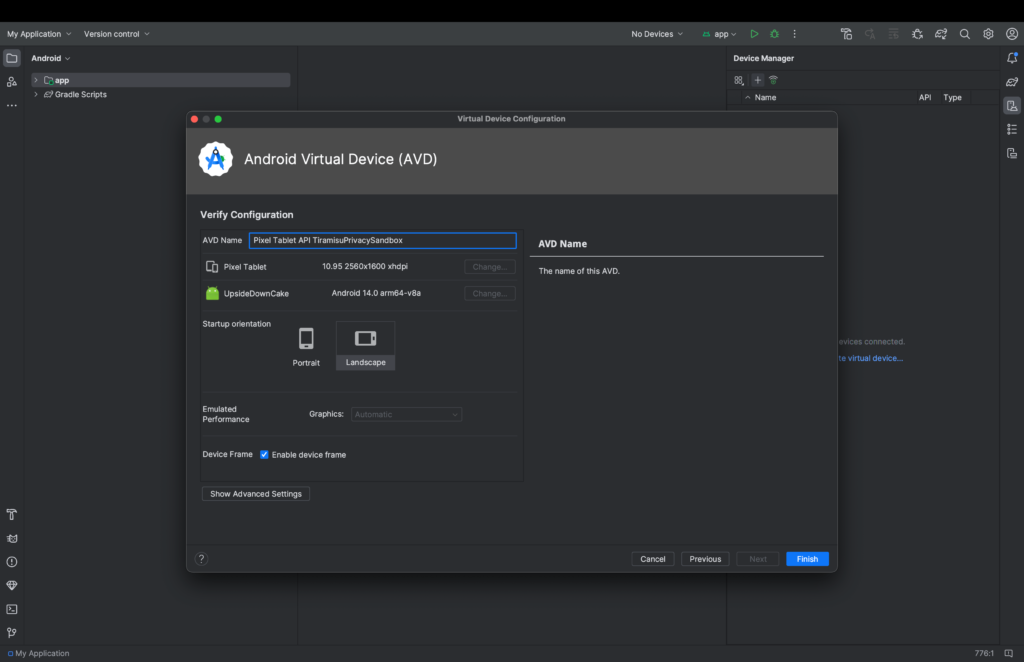
Now it will open with a setup window of Android Virtual Device(AVD) as mentioned in above screenshot.
You can choose orientation : Portrait or Landscape.
19.
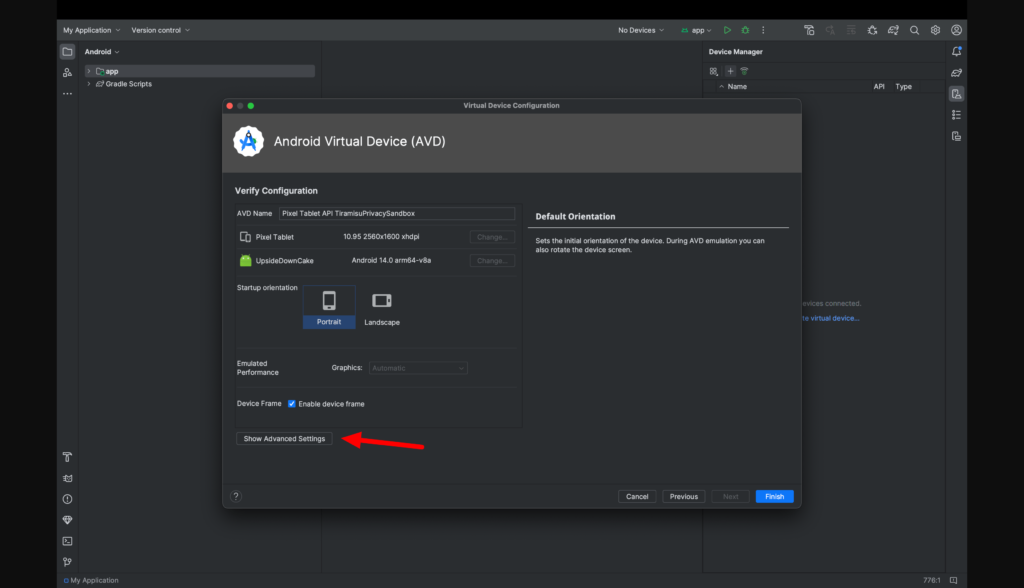
20.
Click on Show Advanced Setting to setup Internal Storage.

Increase size of Internal Storage as mentioned in the above screen.
Now click on Finish.
21.

Now in Device Manger list you can check your newly created Virtual Device . Now click on Play icon as mentioned in the above screen.
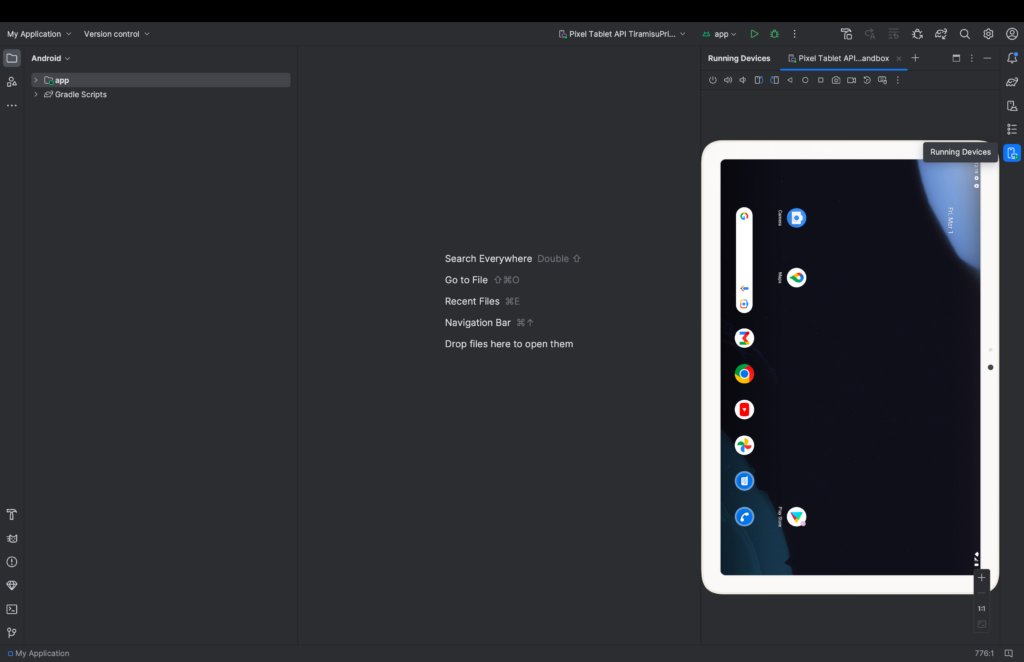
It will open newly created Virtual device. You can also check running devices by clicking on ‘Running Devices’ in right side of the window.
22.
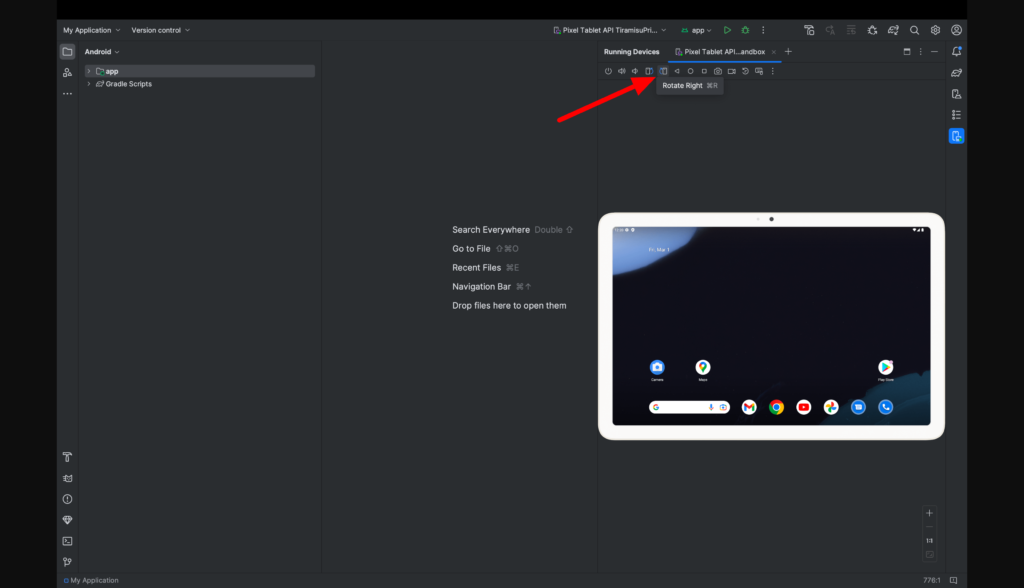
You can rotate image accordingly as your need. You can rotate it as mentioned in the above screenshot.
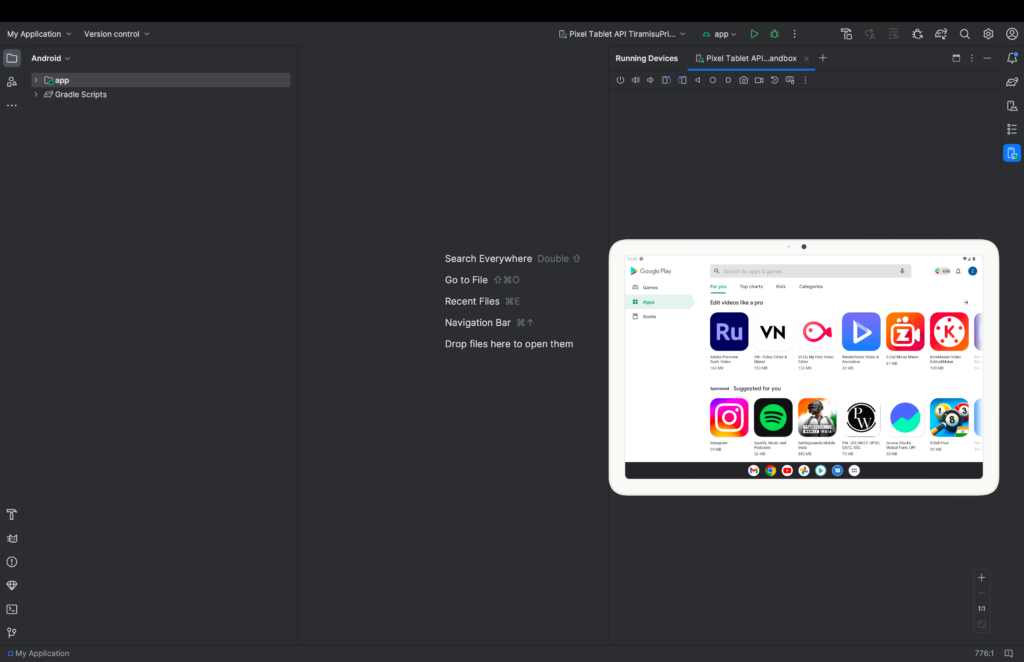
You can open Play Store to install your favourite app.
23.
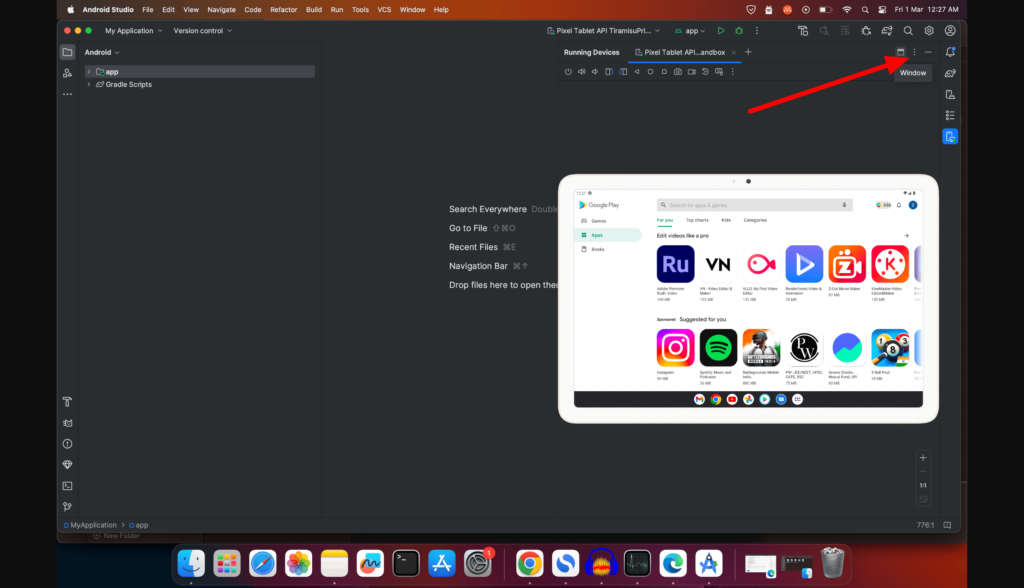
To make your virtual android device as full screen click on three dots as mentioned in the above screenshot.
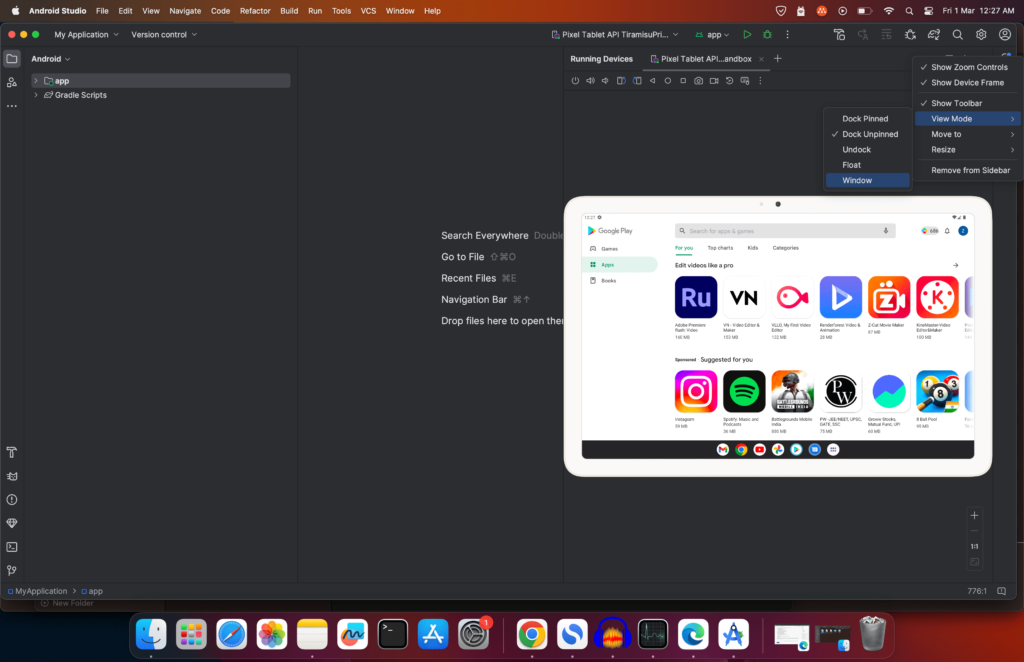
Click on ‘View Mode’ and choose ‘Window’.
24.
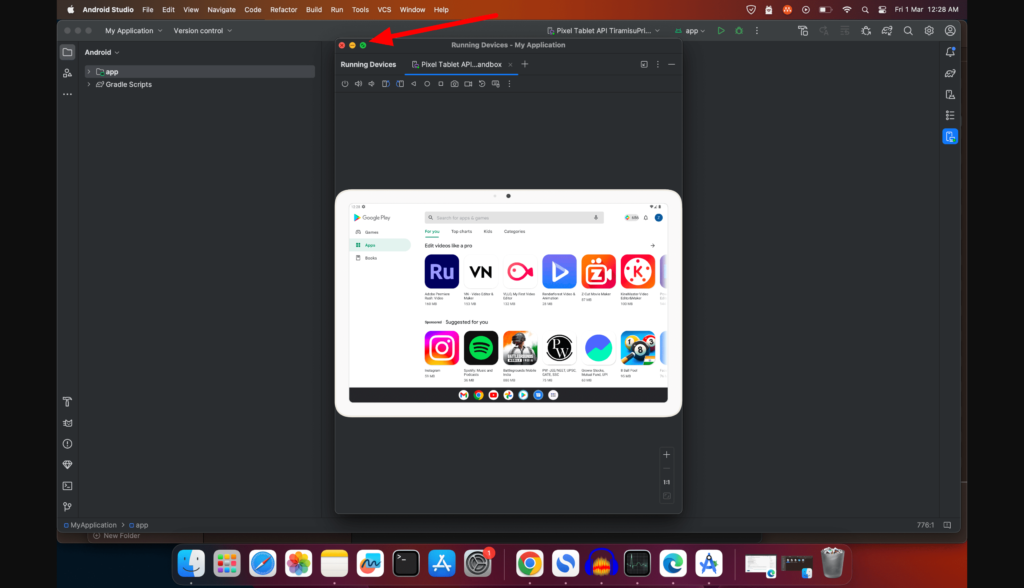
It will open your device in a new Window. Click on Maximise icon of the window as mentioned in the above image to make your device size bigger.
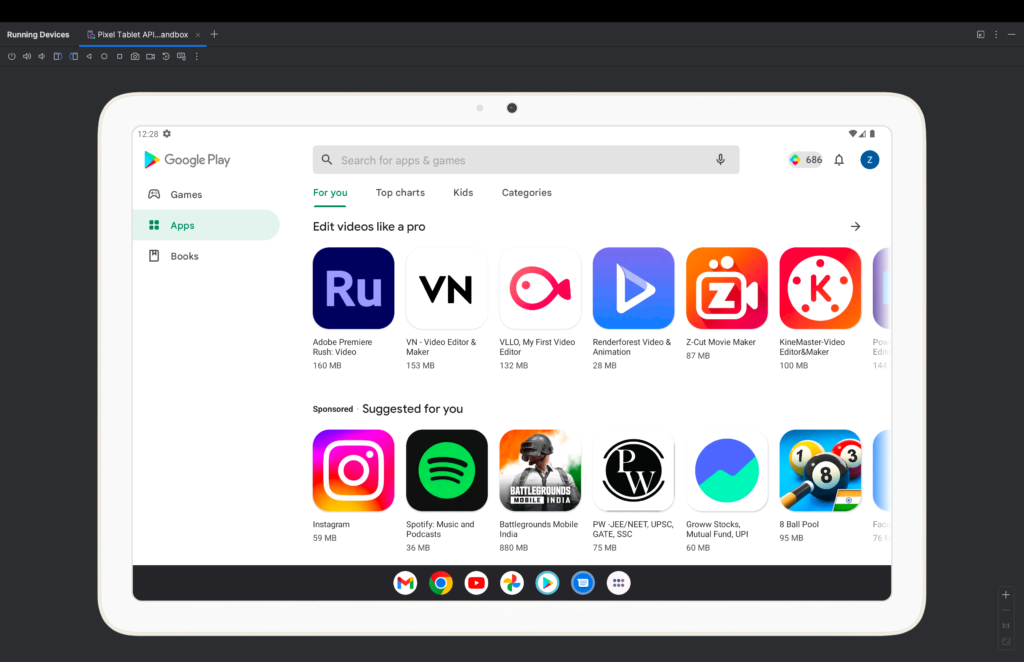
Enjoy.